Saturday, November 30, 2019

Vangi Bath - Brinjal Rice with green brinjals

I started growing the small long green egg plants to get some diversity in the egg plant varieties as I usually grow only the purple ones. These long green eggplants are no less, they are nice and creamy when cooked and works great in a vangi bath. It cooks quickly and maintains its shape. All Bangloreans I know, friends and family are in agreement that these eggplants are the ones that are good in vangi bath.

A friend from Bangalore gave me some home made vangi bath powder so there was no excuse to postpone making it the authentic way. I have a version here where I sauteed the brinjals in the spice, add water and cook it in them. But the method in this recipe is far more tastier.


 photo IMG_3944_zpsptr1m9o9.jpg

Here is the recipe in pictures,
Wash and set the rice to cook by adding salt and a bit of oil.
In a wide mouthed pan, heat oil and add seasonings followed by the onion and chilies.
Once the onions are sauteed add the cut brinjals and saute till they are almost cooked.
Add in the tomatoes and cook till they are mushy. Add the vangi bath powder and mix it in.
Let the masala be well coated on to the brinjals. Fluff up the cooked rice.
Now add the rice into the masala and mix gently so al the rice is coated nicely.

 photo IMG_3964_zpsfnu3j6jm.jpg


Vangi Bath
Preparation Time: 15 minutes
Cooking Time: 25 minutes
Ingredients
  1. 1 cup of Surti Kolam Rice or Basmati Rice
  2. 3 cups of sliced eggplant about 1 - 1 1/2 inch piece
  3. 1/2 cup of chopped red onions
  4. 4-5 slit fresh green or red chilies
  5. 5 small ripe tomatoes chopped
  6. 1 tbsp vangi bath powder
  7. seasonings: curry leaves, mustard seeds and 2 tsp split urad dal
  8. salt to taste
  9. 1 tbsp oil

Method
  1. Cook the rice with salt and about 1/2 tbsp of the oil and set aside to cool. I used an Instant Pot and cooked for 10 minutes. Fluff and set aside.
  2. In a wide mouthed pan, heat oil and add split urad dal and roast till slightly brown, then add mustard and wait for it to pop.
  3. Add in the onions and chilies and saute till the onions are translucent.
  4. Add in the sliced brinjal and saute till the brinjals get soft and are almost cooked.
  5. Add in the tomatoes and cook till they are mushy and coated on the brinjal.
  6. Add the vangi bath powder and mix well and salt, since the rice also has salt be watchful. Add a bit more oil if needed and turn off the heat.
  7. Now add in the cooked rice and mix it in gently. Use cutting motion which prevents the rice from getting mushy. The rice should be well coated with the masala.


Like what you are reading? Subscribe!

Sunday, November 24, 2019

Pumpkin Bread with Chocolate chips and Nuts

Even a news junky like myself cannot stand the news these days. The sound of Trump's nauseating voice just make me depressed and wondering... If there are any Trump fans out there don't worry I am an equal opportunity hater as far as politicians are concerned. Obama did not make me any less depressed! So there.

But one thing that got me very curious was this repeated use of the word 'deep state' by Trump himself, his cronies and everyone from the right wing talk world and I start to wonder to myself if it is not Trump and his myriad of corrupt cronies who could this word actually be referring to? Helpfully enough there was an article in the Washington Post by the person who popularized the word 'deep state' and about what this word actually means. It is not what Trump would like us to believe, that is there is a shadowy cabal of bureaucrats plotting his downfall. Instead this word means 'corporate power' and 'moneyed influencers'. There that actually makes sense. So in this confusion between truth and fiction Trump thrives.
The original essay - Anatomy of the Deep State.


 photo IMG_1695_zpstbitzzto.jpg


Pumpkin had been a vegetable that I had always liked, the mildly sweet creamy vegetable was not on the menu often but when it made its appearance it was special. The pumpkins available in the grocery stores here in the US were not as sweet and texture was not creamy as I would have liked. So for the longest time butternut squash filled the void till I started growing pumpkins for myself. I am slowly realizing the versatility of pumpkins. Pumpkins - the icon of Fall is going to be my favorite vegetable for the next couple of months.

Thanksgiving is just a couple of days away and given a choice I will make the complete menu with just pumpkin :) I am not a big fan of pumpkin pies, so for this reason I had to find something else to replace the pumpkin pie on the Thanksgiving table. I could make this pumpkin halwa and with an Instant Pot an extremely easy dish to make if you have a sweet tooth. But my absolute favorite is the recipe that follows for Pumpkin Bread, the pumpkin makes this bread absolutely moist and delicious.

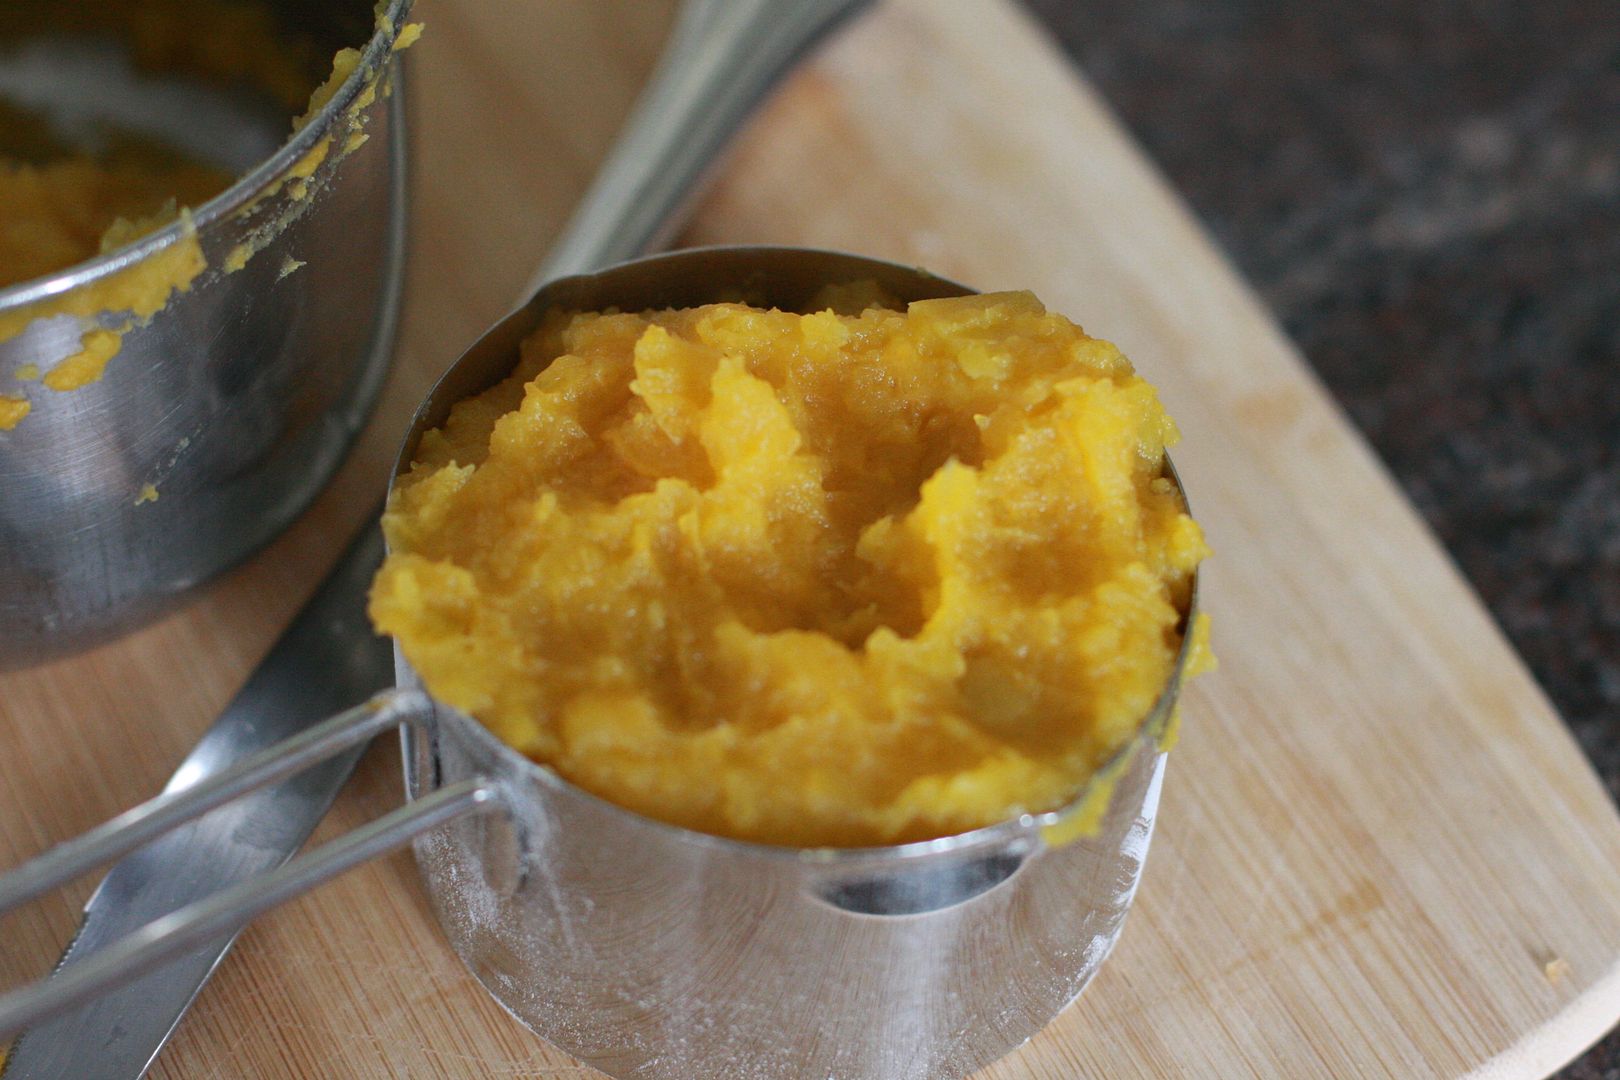
I steamed pumpkin cubes and mashed them. You could roast the pumpkin too if you wanted. Use unsweetened canned pumpkin puree if you do not have pumpkin. Get your family excited this Thanksgiving by making this pumpkin bread. I guarantee that no one would be disappointed. I followed the banana bread recipe by replacing the mashed bananas with mashed pumpkin.

I also have an Olive Oil Squash Bread if you want a slightly different version with nutmeg and ginger powder.

The Banana Bread recipe is here. Here is the recipe in pictures of the Pumpkin Bread. So if any of you out there wondering about replacing pumpkin pie with something else that is much to your liking you got to try this recipe.


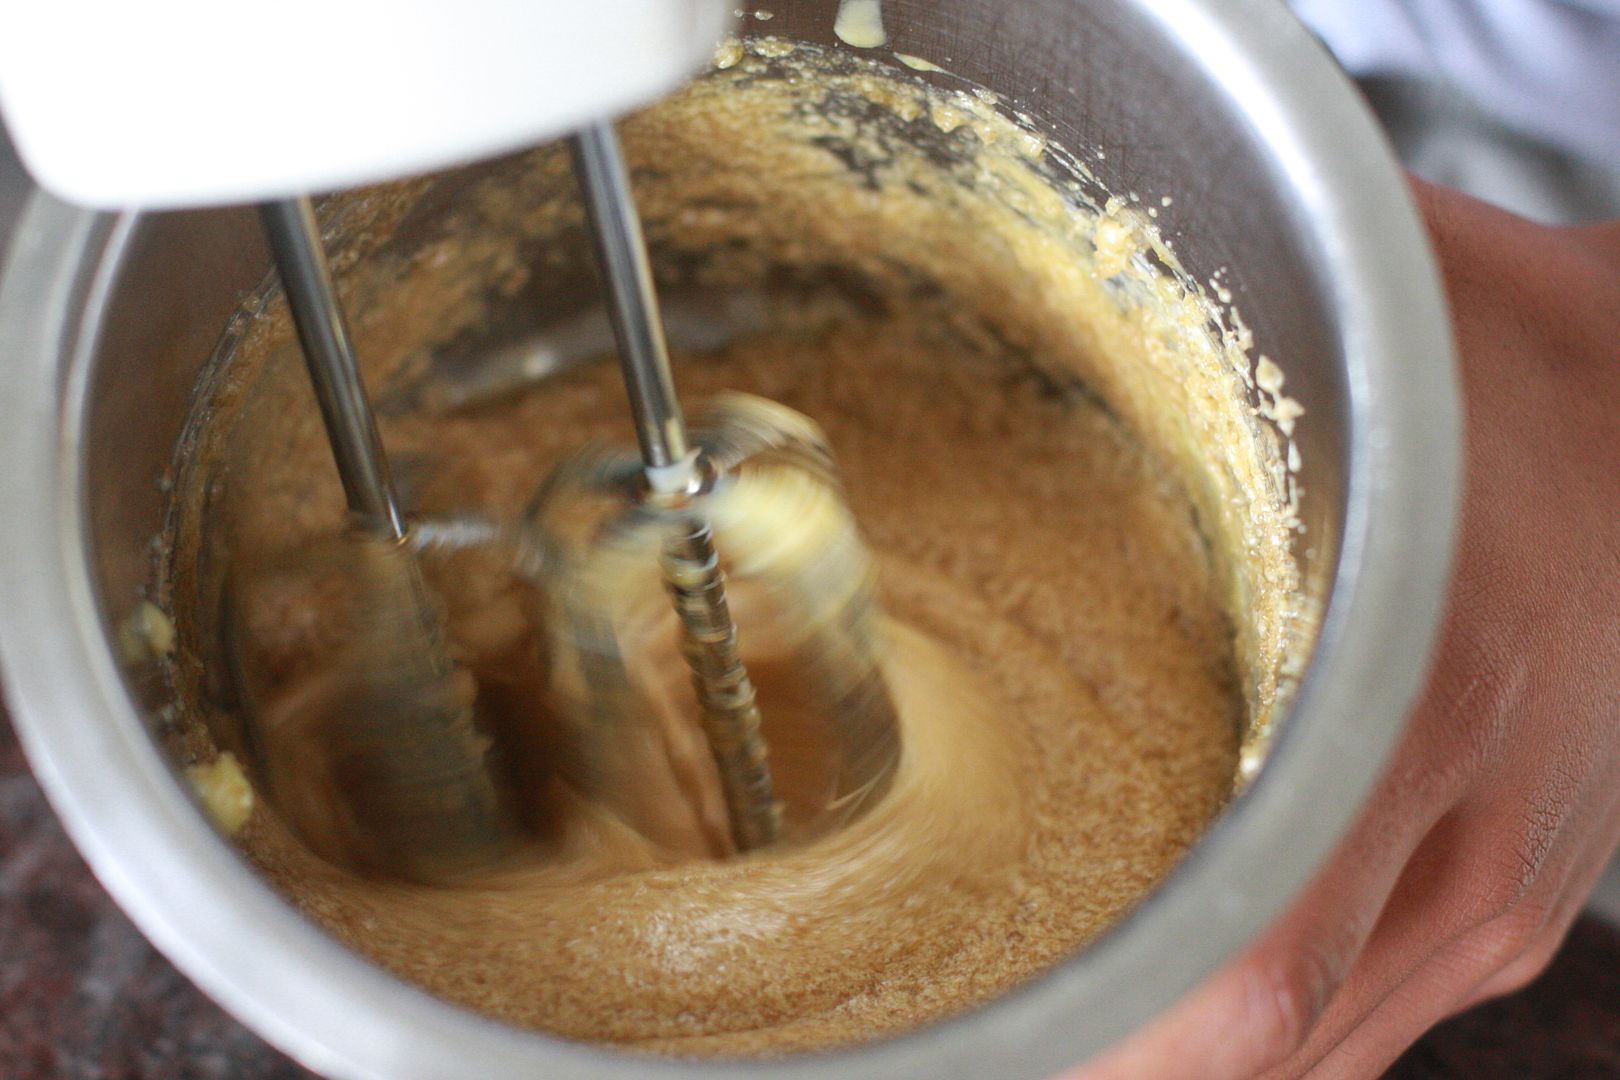
Whish the eggs till frothy, add the butter and sugar and whisk till well mixed.
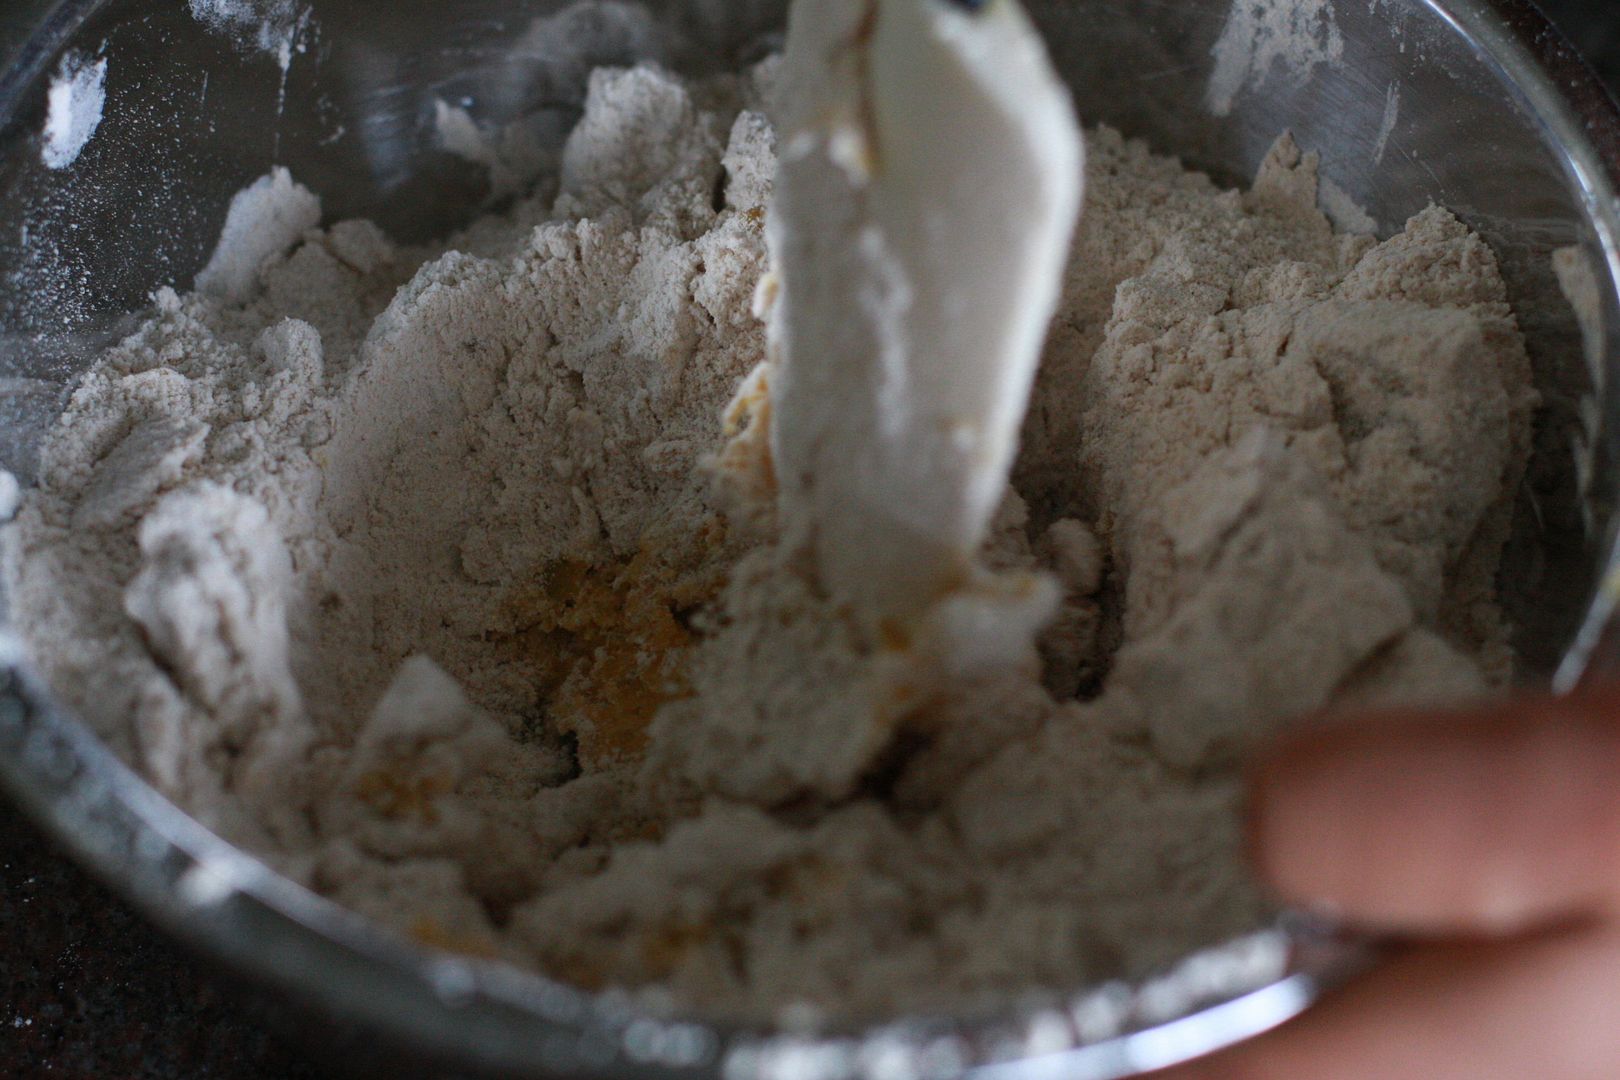
In a mixing bowl, take all the dry ingredients add the mashed pumpkin, mix it in and add the whisked egg-butter-sugar to the flour.
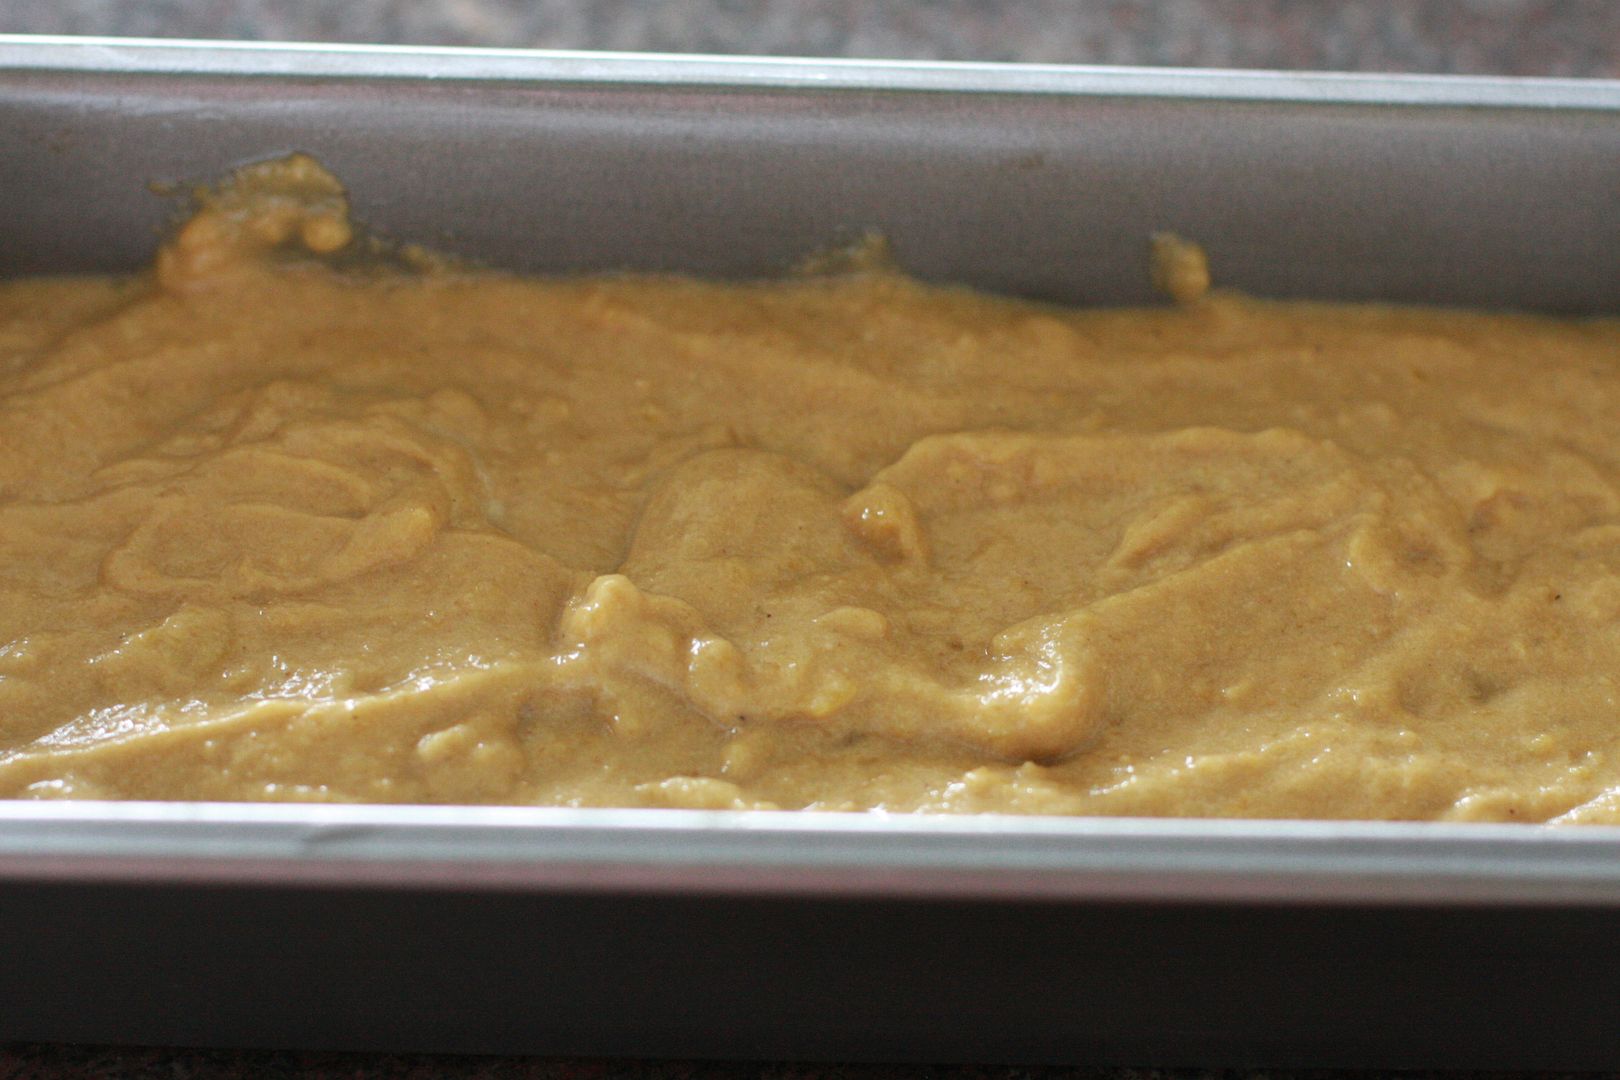
Add the milk so the batter comes together and pour into greased baking pans.
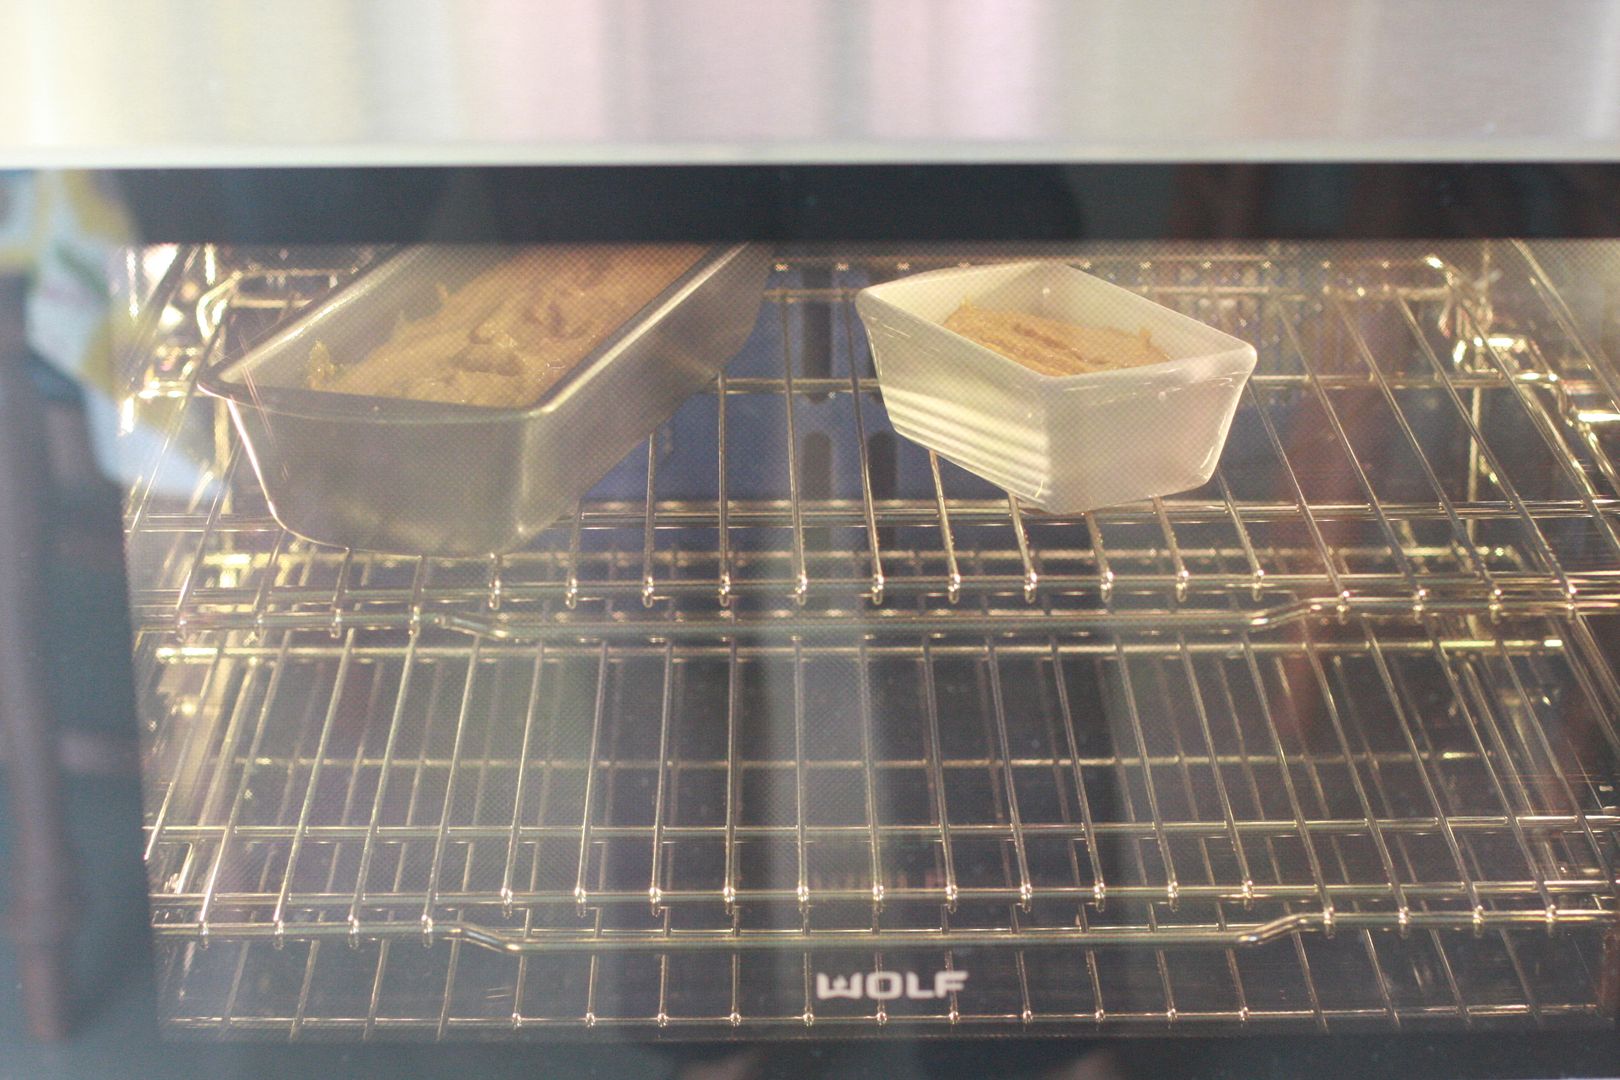
Bake for 45 minutes in a preheated 350F oven.
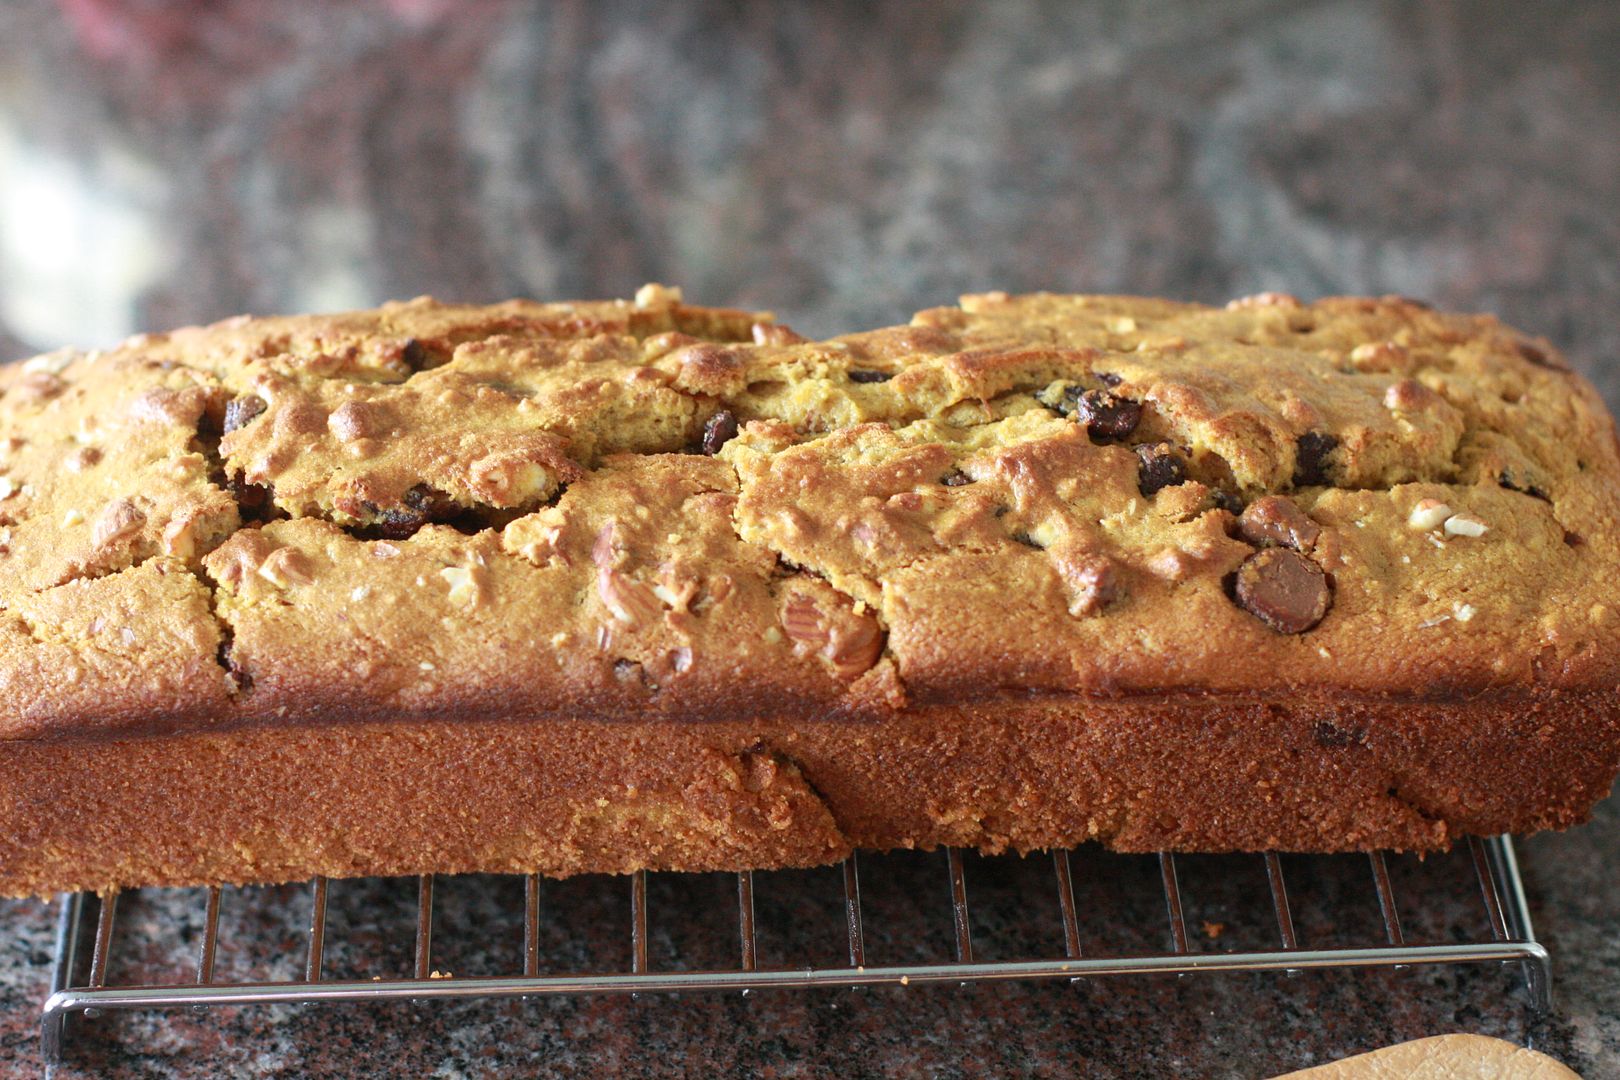
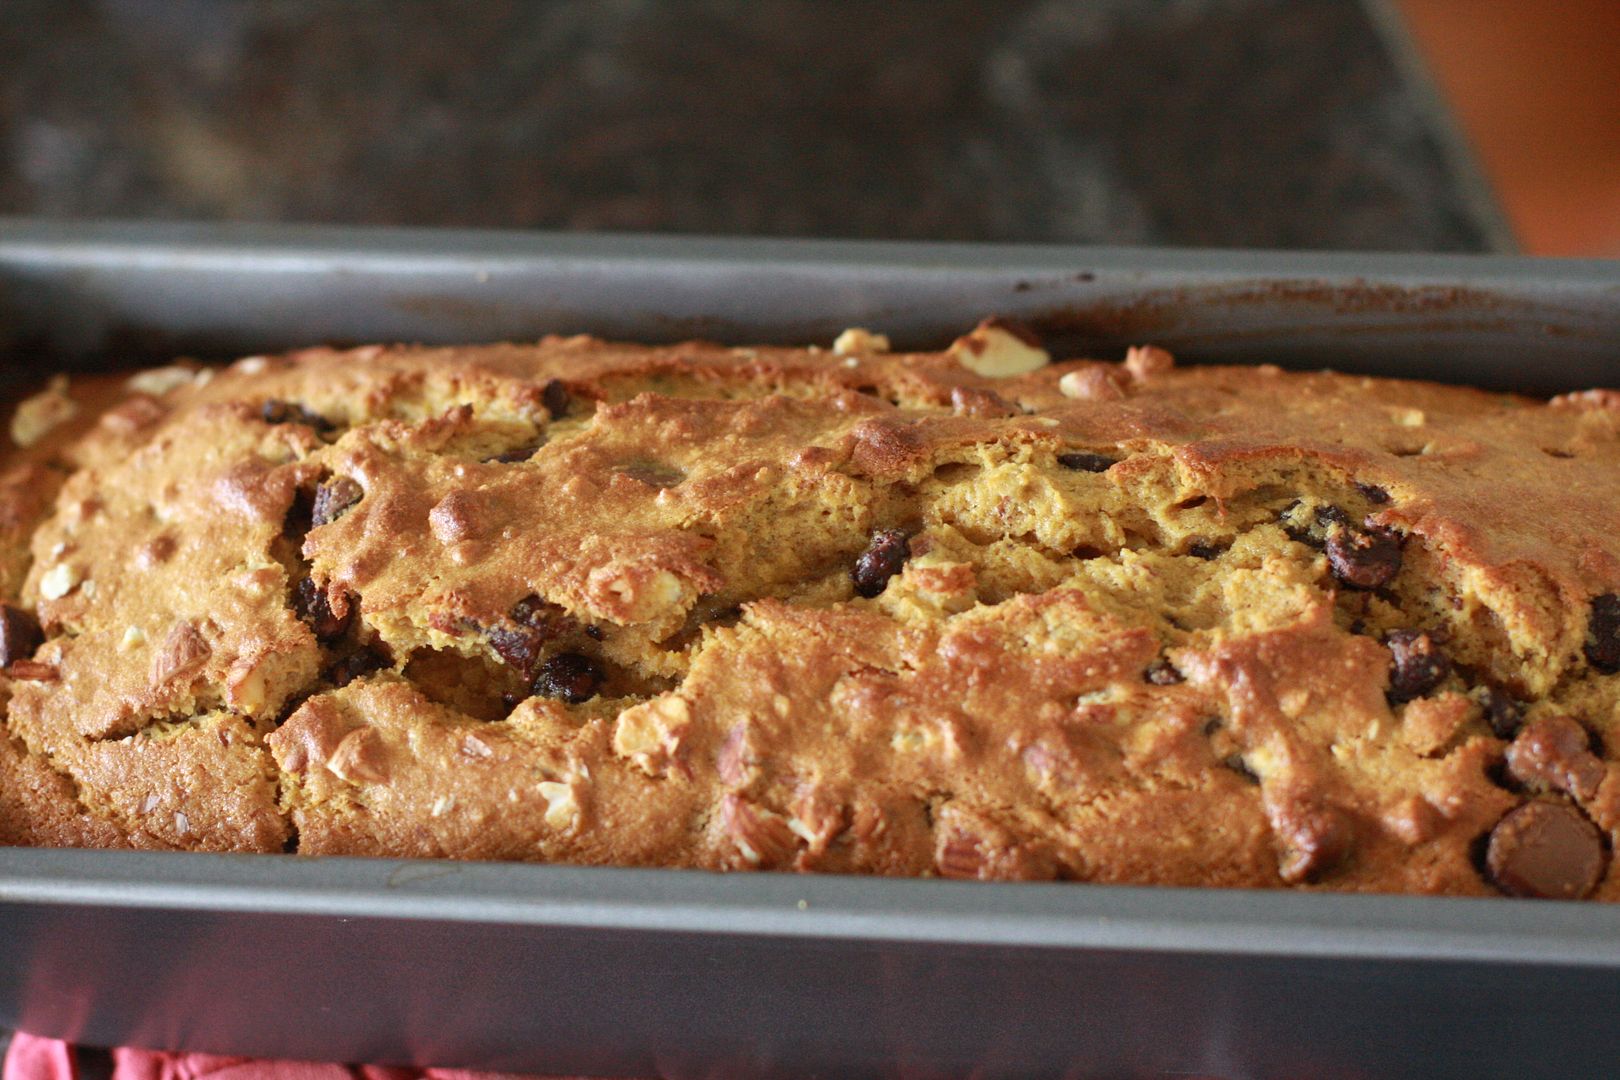
Cool on a wire rack for at least half hour before slicing.


 photo IMG_4045_zpsxyk0mjve.jpg

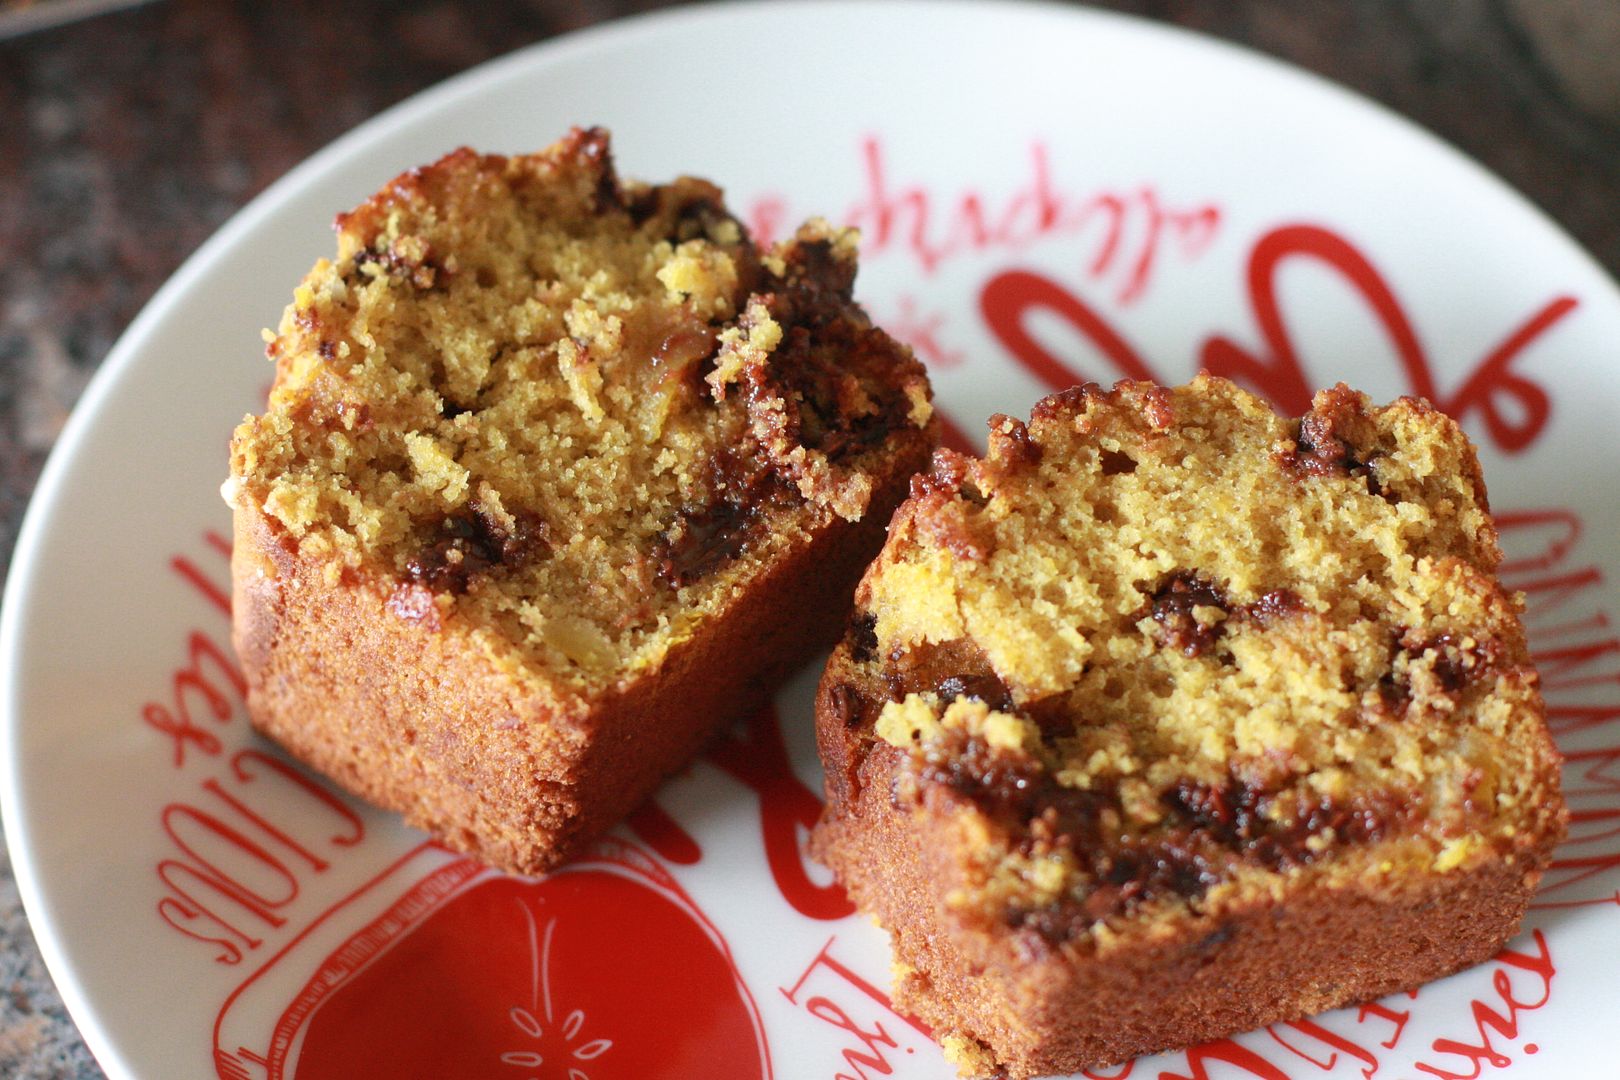
Pumpkin Bread with Chocolate Chips and Nuts
Preparation Time:20 minutes
Baking Time:45 minutes
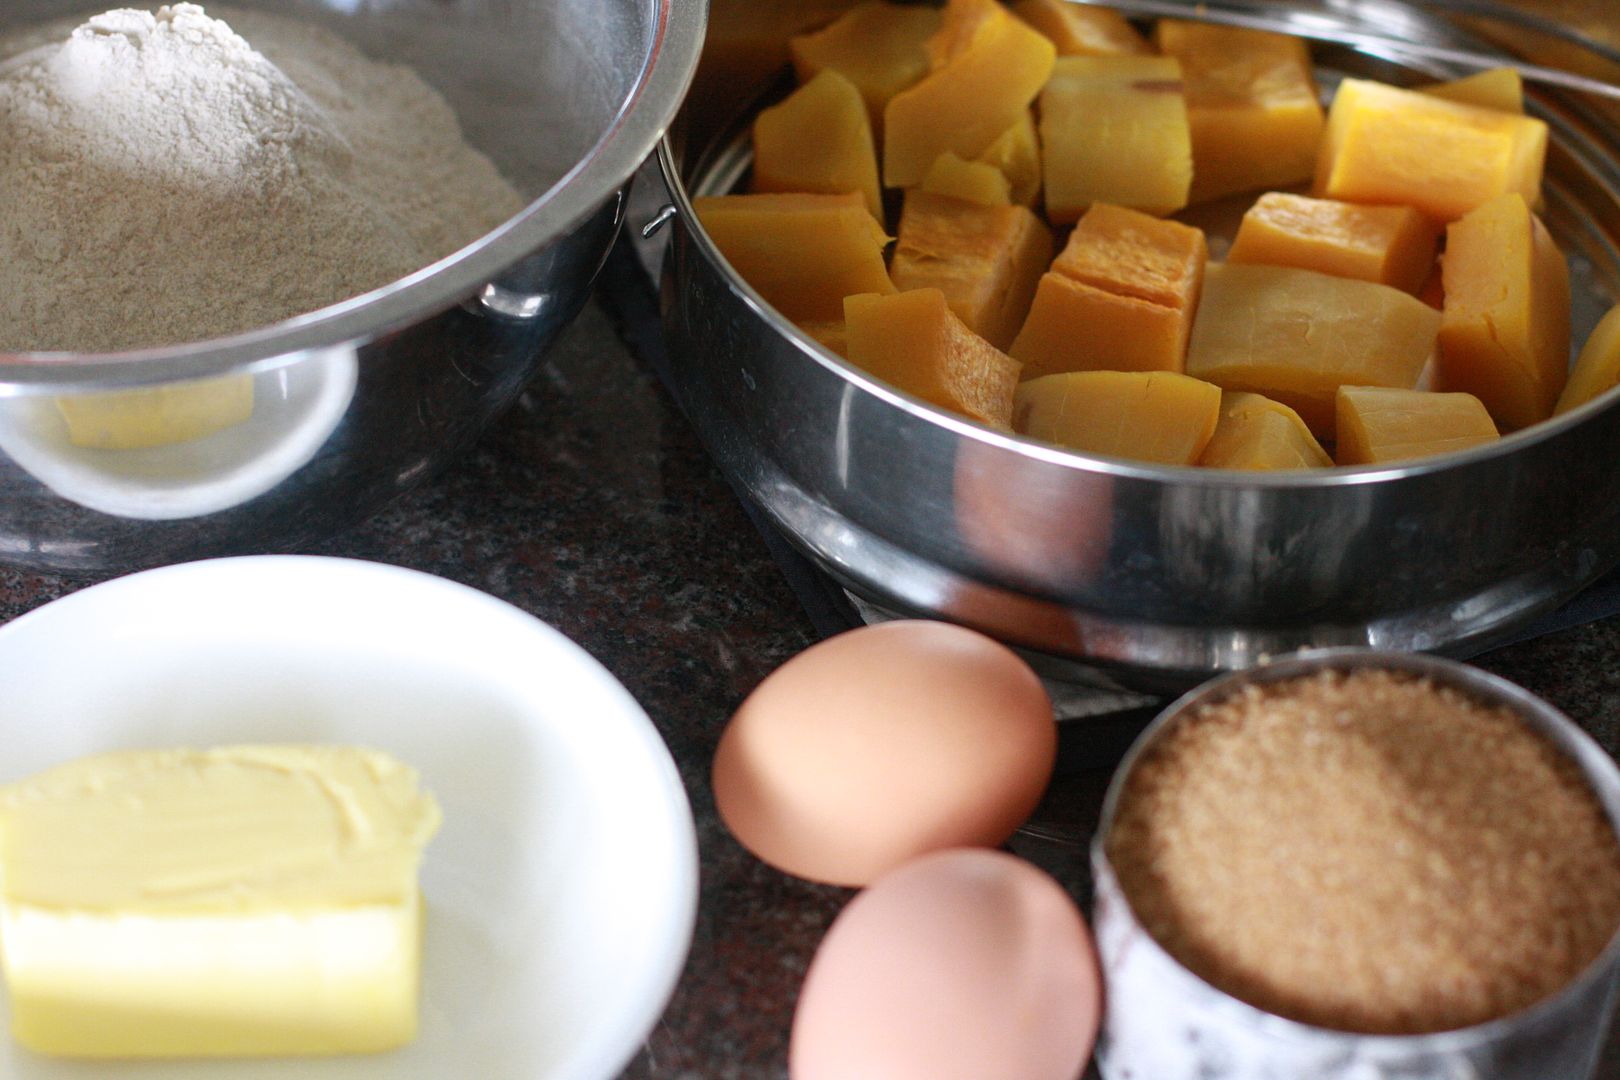
Ingredients
  1. 2 cups of unbleached white whole wheat flour
  2. 1 3/4 cups of Pumpkin Puree*
  3. 2 tsp baking soda
  4. 1/2 tsp baking piwder
  5. 2 eggs
  6. 1/4 cups of coarsely chopped roasted unsalted almonds
  7. 1 cup of raw sugar
  8. 6 tbsp of unsalted butter (bring to room temperature) + 1/4 tsp of salt, skip salt if using salted butter
  9. 1 cup whole milk (use just enough to moisten the batter)
  10. 1/2 - 3/4 cup of chocolate chips

Method
  1. Preheat oven to 350F.
  2. *Cut pumpkin, remove seeds and pith, peel and cut into 2-3 inch cubes and in a steamer steam for about 8 minutes, let cool and mash with a back of a spatula. Set aside.
  3. Whisk together the flour, baking powder and baking soda in a mixing bowl.
  4. Using a egg beater or hand whisk, whisk the egg till it is nice and fluffy.
  5. Add butter, sugar and run the beater a bit longer so they mix well.
  6. Get a 9 x 5 inch rectangular loaf pan ready by greasing the pan with butter and dust with flour if needed (I did not).
  7. Add the mashed pumpkin into the flour and gently mix it in.
  8. Now add the whisked ingredients in batches to the flour and with a spatula mix. Add as much milk to moisten the batter. Use only as much as needed. I needed the full cup of milk. Do not over mix.
  9. Add the chocolate chips and almonds and gently mix so they spread evenly.
  10. Pour the batter into the loaf pan and smooth the top.
  11. Bake for 45 minutes till a skewer or tooth pick inserted comes out clean. Cool on a rack for at least 30 minutes before slicing.

Delicious warm or cold.

Like what you are reading? Subscribe!

Wednesday, November 20, 2019

Bell Pepper with Potatoes in a peanut coconut curry

I know I know, a lot of bell pepper recipes. Over the summer I rediscovered bell pepper in a whole new way. Like I mentioned DD2 likes anything cooked with bell pepper but me not so much, primarily I don't seem to digest it well. But ever since I started growing them I have realized that they are not as big as the ones in the store and also not as filled with water - succulent is the word I was looking for.

The ones I have in my garden are nice and crunchy and not as gas producing as the store bought ones. Well anyway who isn't proud of the fruits of their labor? Once I got over the flatulence problem a whole array of recipes opened up where bell peppers could be used. So this one is a creamy peanut coconut curry with Bell Pepper and Potatoes. It is one of the best. Pairs well with either rice or any Indian bread.


The combination of bell pepper and potatoes works very well in a peanut coconut curry with a hint of tomatoes.

Sauté the ingredients under the sauce section and blend it to a smooth paste.
In a wide mouthed pan, heat the oil, add seasonings followed by the potatoes and bell pepper. When half cooked add the spice paste and enough water.
Cook till the potatoes are completely cooked and desired consistency is reached.


This peanut coconut curry is versatile that it can be used with any vegetable of choice. It is almost like this combination was made for each other. I for one would not have tried them together if I did not have both home grown potatoes and bell peppers harvested and just waiting to be cooked fresh :)


 photo IMG_3894_zpsfy1jonmd.jpg

Bell Pepper with Potatoes in a peanut coconut curry
Preparation Time: 15 minutes
Cooking Time: 25 minutes
Ingredients
  1. *6-8 Bell Peppers - seeds and the white ribs removed and diced (about 3 cups)
  2. 2 medium sized white potatoes about 2-3 cups
  3. 1/2 cup of diced red onions
  4. seasonings: curry leaves, 1/4 tsp mustard seeds, a pinch of cumin seeds
  5. salt to taste
  6. 1/2 tbsp oil
  7. For the sauce
  8. 1/2 cup of onions
  9. 1 inch ginger chopped
  10. 3 tomatoes chopped about 3/4 cup
  11. 1/4 cup of grated fresh coconut
  12. 1/2 cup of roasted peanuts
  13. 4 red chilies
  14. Note:*These are home grown bell peppers much smaller than the store bought ones. If using store bought about 2 medium sized ones would suffice.
Method
  1. In a saute pan, heat oil saute the onions, chilies and ginger and when the onion starts to brown add the tomatoes and saute till mushy.
  2. Add the grated coconut and the peanuts, saute for a minute and turn off the heat and let cool.
  3. Add the sauteed ingredients to a blender along a 1/4 cup of water and blend to a fairly smooth paste.
  4. In a wide mouthed saute pan heat oil and add the seasonings, when the mustard starts to pop, add the onions and saute till translucent.
  5. Add in the potatoes and sauté for a few minutes and then the bell pepper and sauté till they start to blister.
  6. Add in the blended paste and a about a cup of water (or more if you want a slightly loose curry) and salt.
  7. Cook for about 6-8 minutes till the potatoes are fully cooked.
Like what you are reading? Subscribe!

Thursday, November 14, 2019

Bell Pepper and Mushroom Omelet

Preparing lunch for the kids in the morning when you are hardly awake is not an easy task but has to be done. If you can cook something they enjoy and it has a few vegetables it definitely is a good thing at least in my books. Eggs are something that most kids enjoy so if it can be made a bit more nutritious but without a lot of work that would be a good thing isn't?

DD2 likes bell peppers and mushrooms so adding to them while making an omelet was a no-brainer. This way we both get what we want. She gets an omelet sandwich and I clear my conscience saying she at least got to eat some vegetables for lunch. Smart don't you think? ;)


 photo IMG_3746_zpsoy9mwljc.jpg

I used oyster mushrooms but any kind of mushroom is fine really. Here is the recipe in pictures,

Saute the onions, jalapeno, bell pepper and mushroom and set it aside. Whisk the eggs.
Mix the cooked vegetables into the whisked egg. Heat a sauce pan grease it and add about a 1/4 cup of the egg mixture. Cook on one side.
Flip the omelet and cook on the other side. Toast the bread, spread the cheese and melt it. Spread the spice spread if wanted.
Place the omelet on the melted cheese and close the bread with the other slice.

 photo IMG_3916_zpse84dllvy.jpg


Bell Pepper and Mushroom Omelet
Preparation Time: 5 minutes
Cooking Time: 15 minutes
Ingredients
  1. 2 eggs
  2. 1/2 Red Onion or 4 shallots diced fine
  3. 3 Small Bell Peppers seeds removed and diced (about 3/4 cup)*
  4. 1/2 cup of diced mushrooms
  5. 1 jalapeno de-seeded and diced or 1 green chili
  6. salt to taste + 1/4 tsp of black pepper powder
  7. 1/2 tbsp olive oil
  8. For the sandwich
  9. pepper jack or any cheese of choice
  10. 2 slices of bread
  11. 1/4 tsp ghee
  12. Note:* These are home grown smaller sized bell pepper, in a store bought one a 1/2 or 3/4 should be about the same.

Method
  1. In a saute pan, add the oil and when hot add the onions and chopped chilies and when the onions become translucent add in the bell peppers.
  2. Saute till the bell peppers are fully cooked and the onion is starting to turn color.
  3. Add the diced mushrooms with salt and pepper and cook for 2-3 minutes. Turn off the heat and let cool a bit.
  4. Crack open the eggs in a vessel and whisk till frothy and add the cooked vegetables to it.
  5. Set a small pan to heat, add a tiny bit of oil and add about a 1/4 cup of the egg mixture.
  6. Let cook on one side, flip and cook on the other side.
  7. While the omelet is cooking apply ghee on the bread and toast it in a griddle on both sides till it is slightly browned.
  8. Spread the cheese on the both slices of bread and let it melt. I use a toaster but leaving it on the Put the omelet and close with the other piece of bread. If desired add a spicy spread over the omelet (like tomato thokku).

Perfect lunch time sandwich or a morning breakfast.

Like what you are reading? Subscribe!