Sunday, January 26, 2020

Kadai Chicken - Gravy Style

I used to watch a whole load of Tamil movies when I was younger. Not so much mow. Now I sleep while watching movies, meaning the minute the movie starts playing I go to sleep. At some point I stopped watching Tamil movies altogether. I picked it up a couple of weeks ago due to boredom. Night comes sooner and add to that cloudy, rainy, windy or snowy days, movie watching is what is left to do :(

I look for movies with actors that I know and hoping there are no cringe worthy scenes, and having to juggle the remotes to switch to a different channel when kids walk in. The movie that was decided on was "Un Samayal Arayil" with Prakash Raj and Sneha. Was it a good decision or what!! The opening song set the tone and it was treat for the senses and the tongue . It again confirmed, no other cuisine can come anywhere close to Indian cuisine. Food Memories made me wonder for the umpteenth why I left my home country. Even if you don't watch the whole movie, just watch that one song to tingle your taste buds.


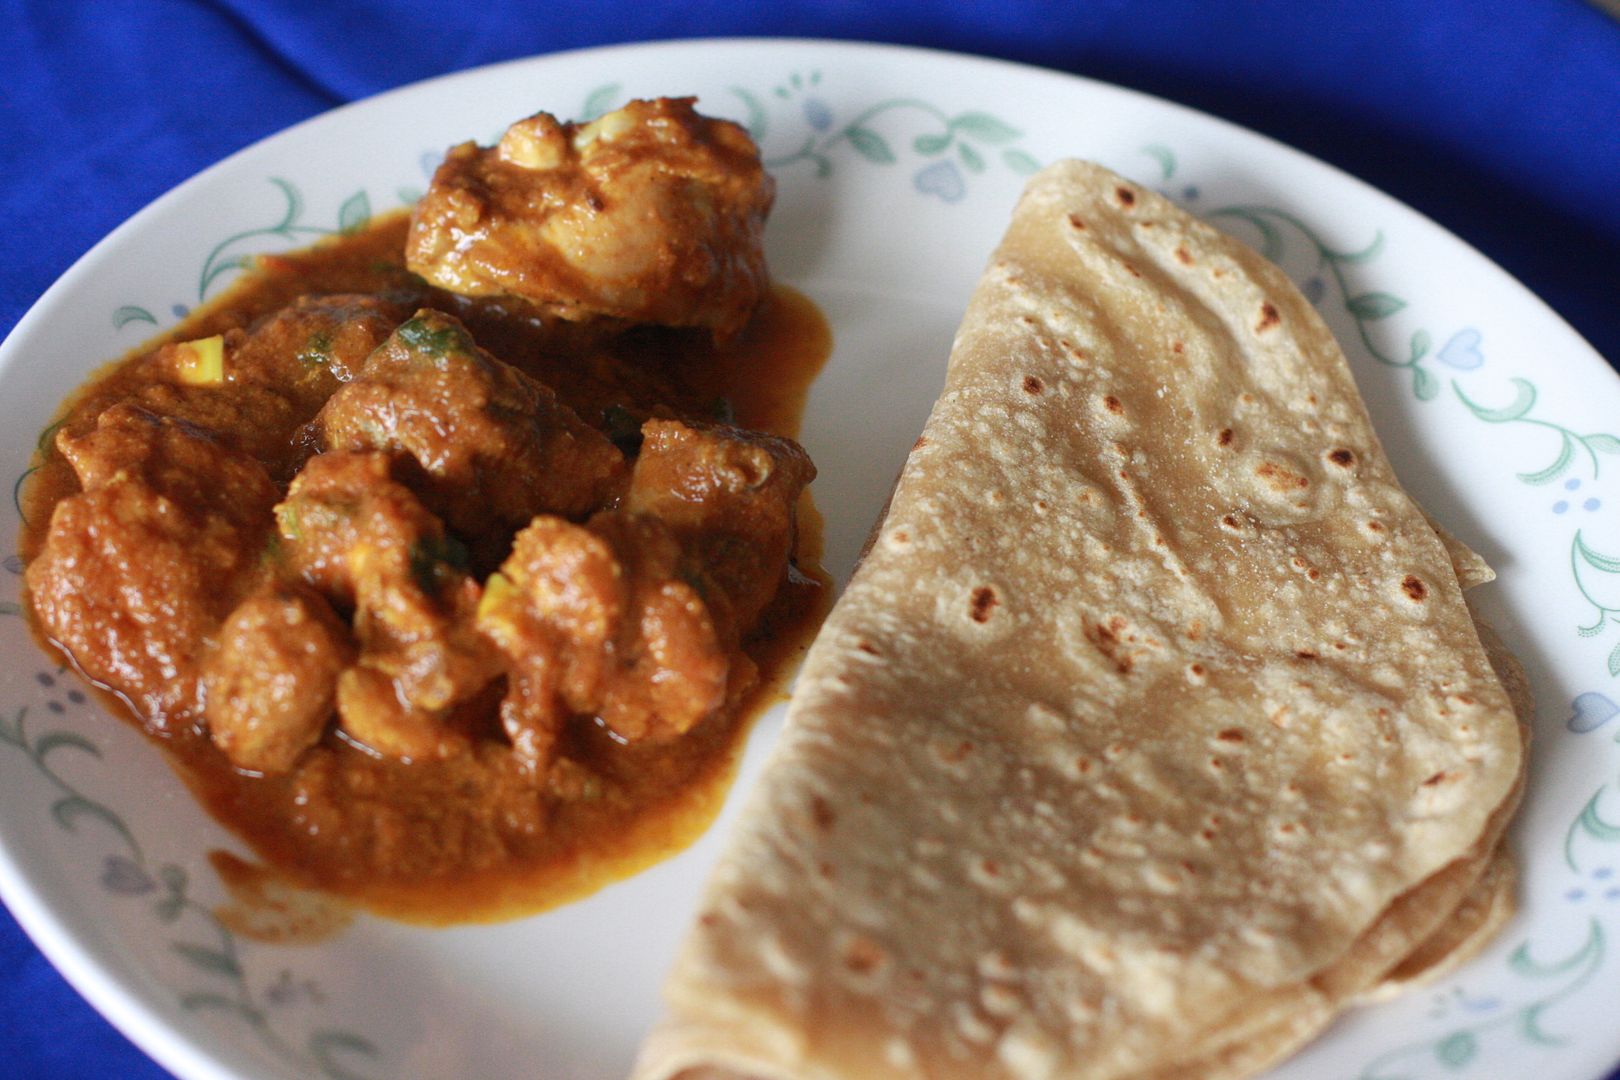
I have a version of Kadai Chicken which is a slightly drier version of the recipe. The one today has a rich gravy and is perfect to eat with flaky parottas. After watching the movie that was what I was craving.

The recipe has a few steps without which the gravy can be made but the end results won't be this smooth luxurious gravy that we made here. Ideas came from my brother and was cooked by my mother and brother. I took a spectator role :) Together with some soft chapatis I was in food heaven.

This one is not the quick and easy curries that I normally make. If you want to make this choose a lazy Saturday or Sunday when you can dedicate 45 minutes to an hour to cook.

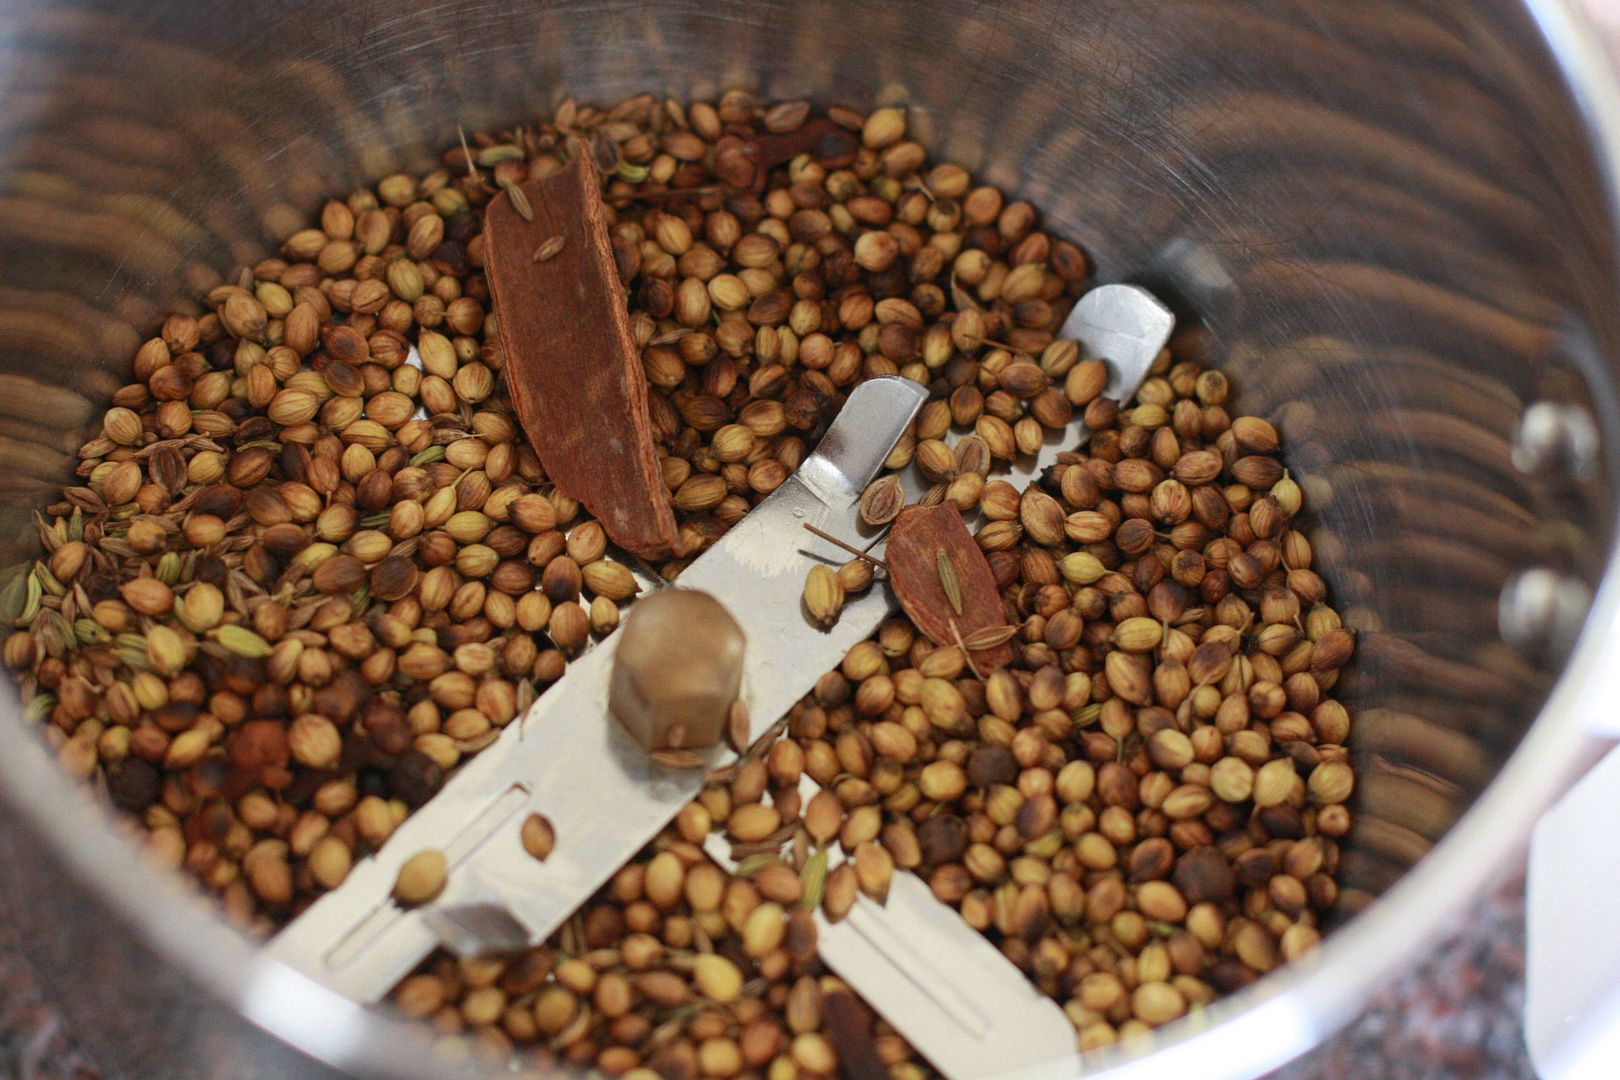
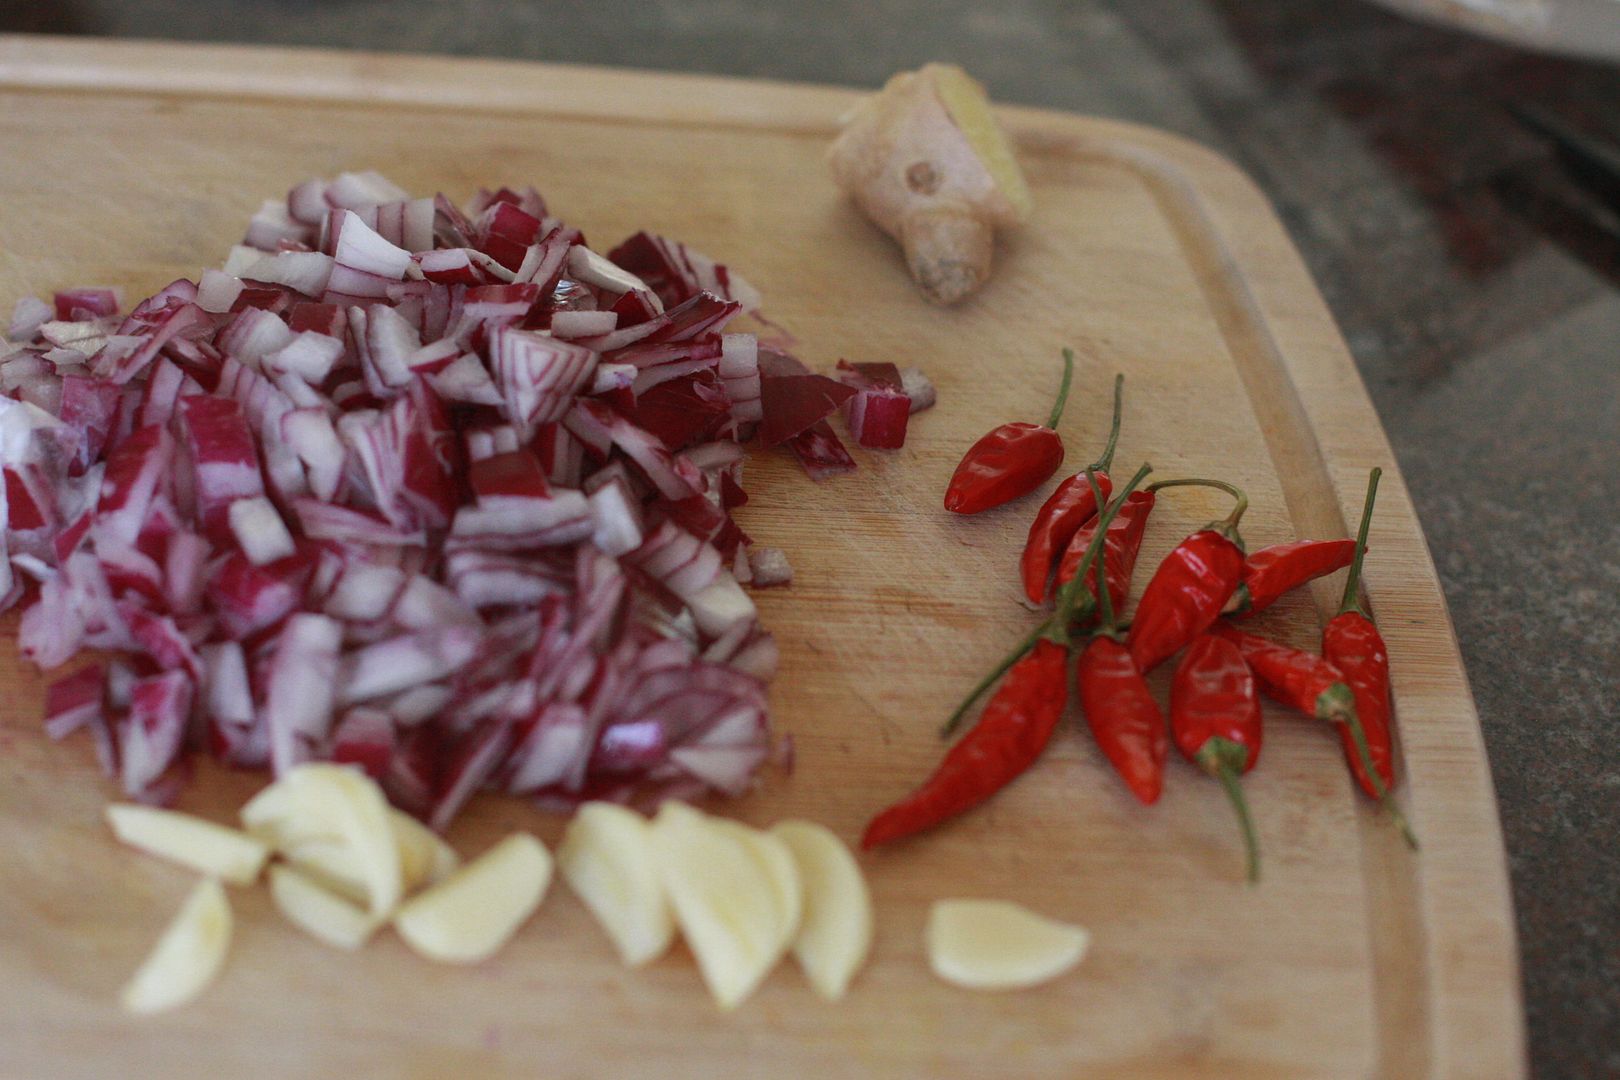
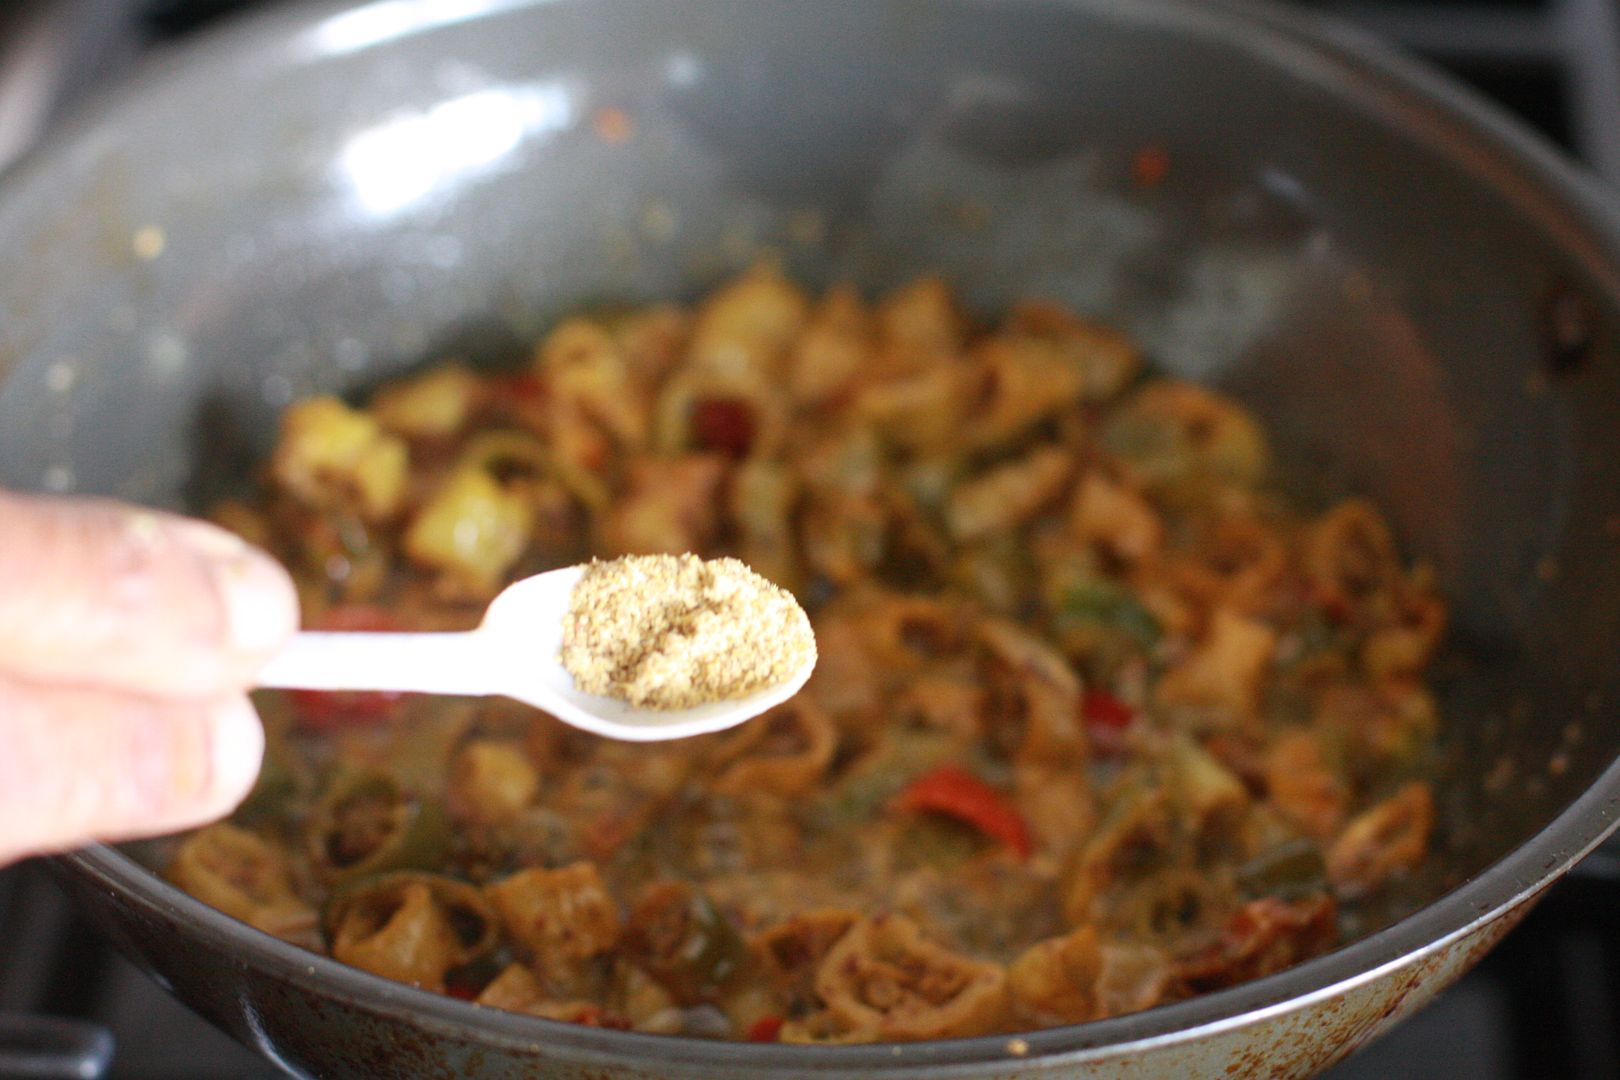
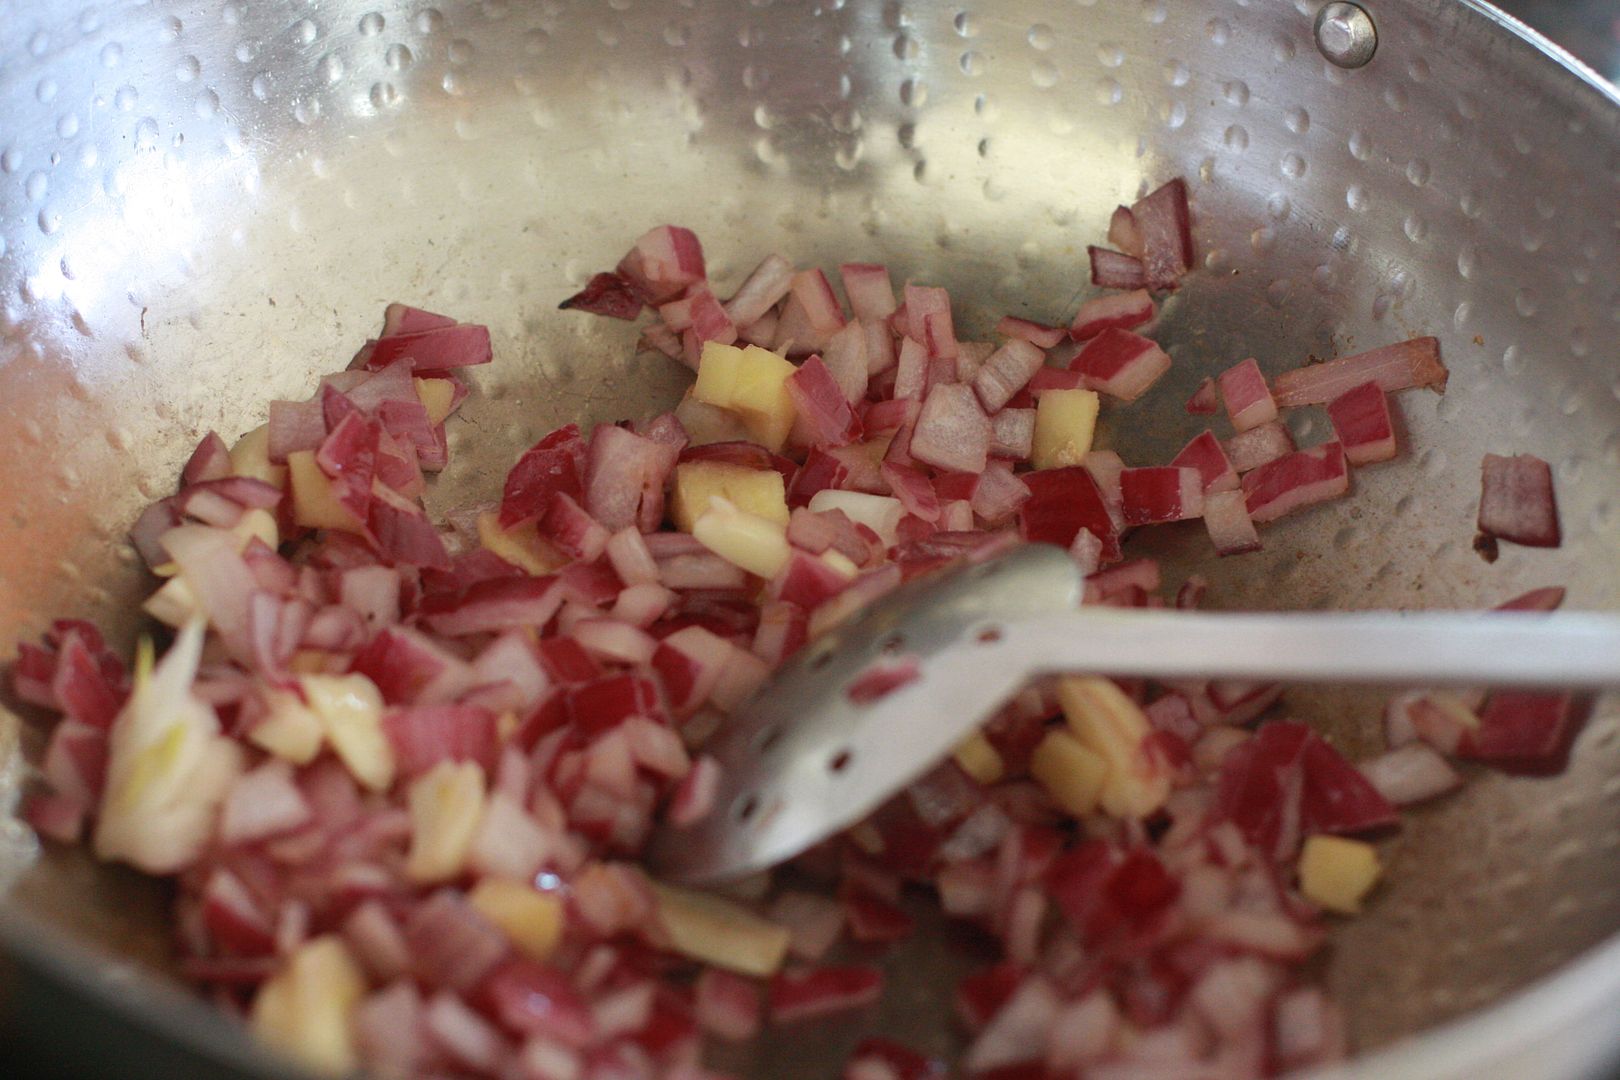
Dry roast coriander, cumin, peppercorn, cinnamon, cloves, remove to a blender and blend to a powder. Chop onions, ginger, garlic and red chilies.
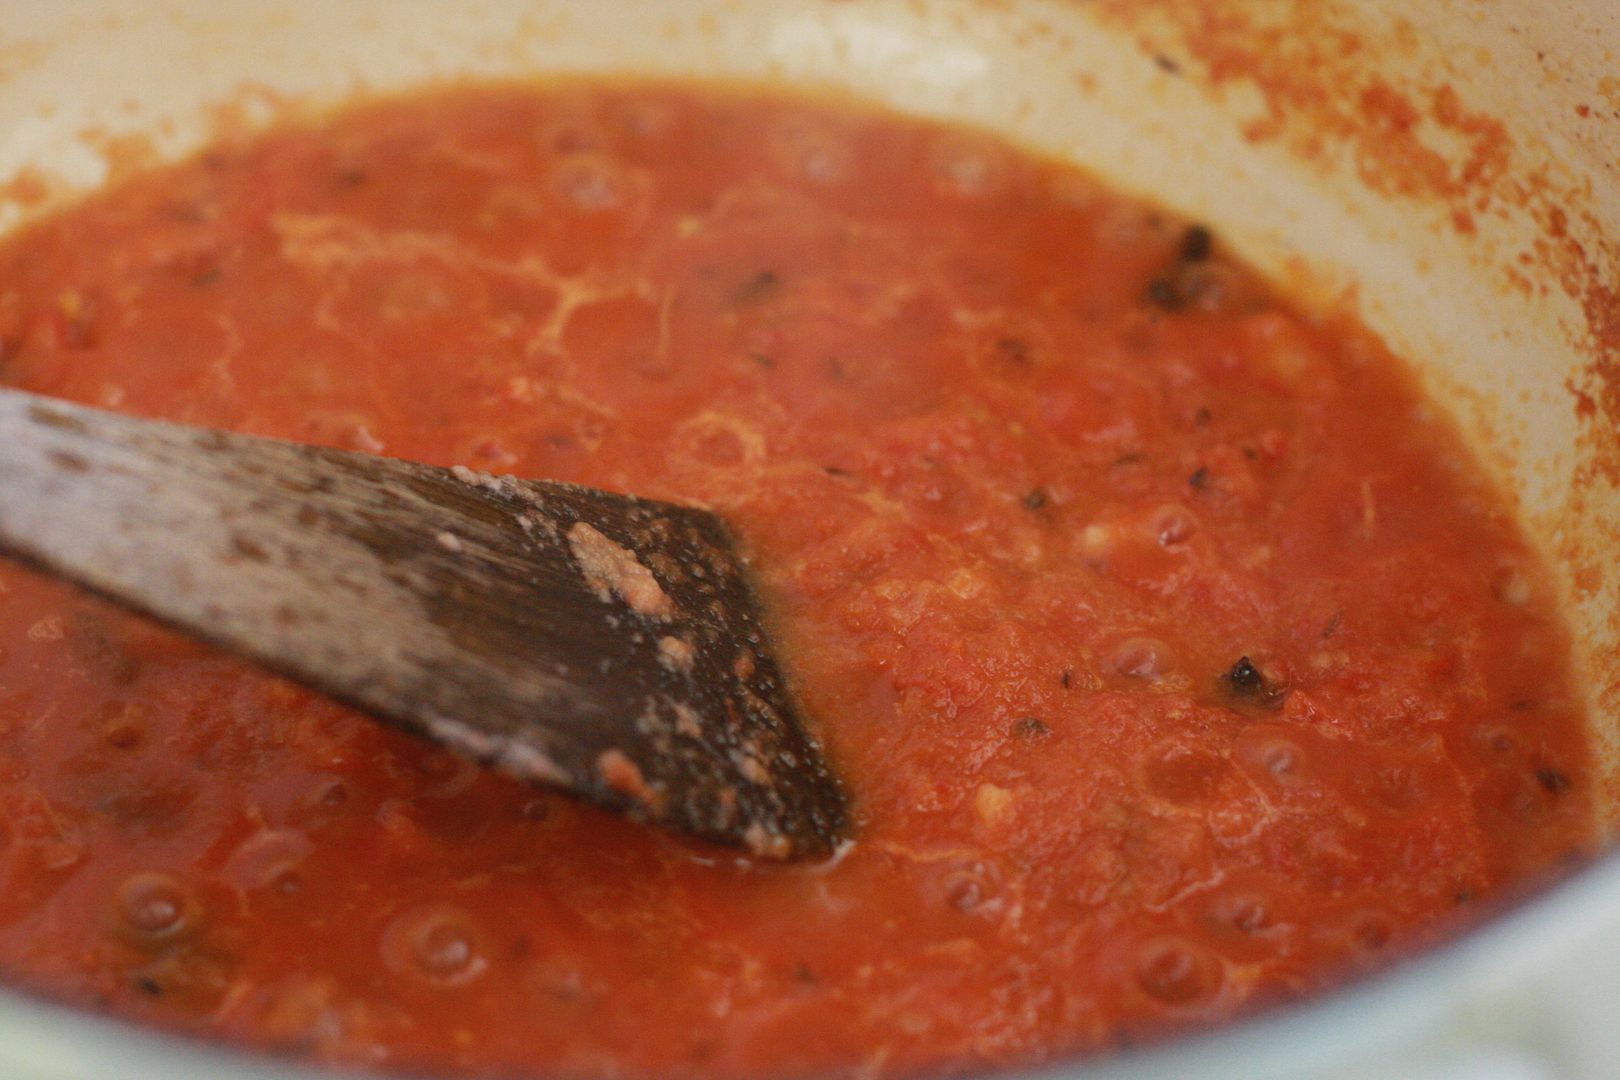
Sauté the onions, garlic, ginger along with the chilies and add that to the powdered coriander seeds mixture and blend to a smooth paste. Separately blend about 1/2 cup of raw onions. In a wide mouthed deep pan add oil, when hot add whole spices and the blended raw onions, sauté till it leaves oil, add the chopped tomatoes and let it get mushy.
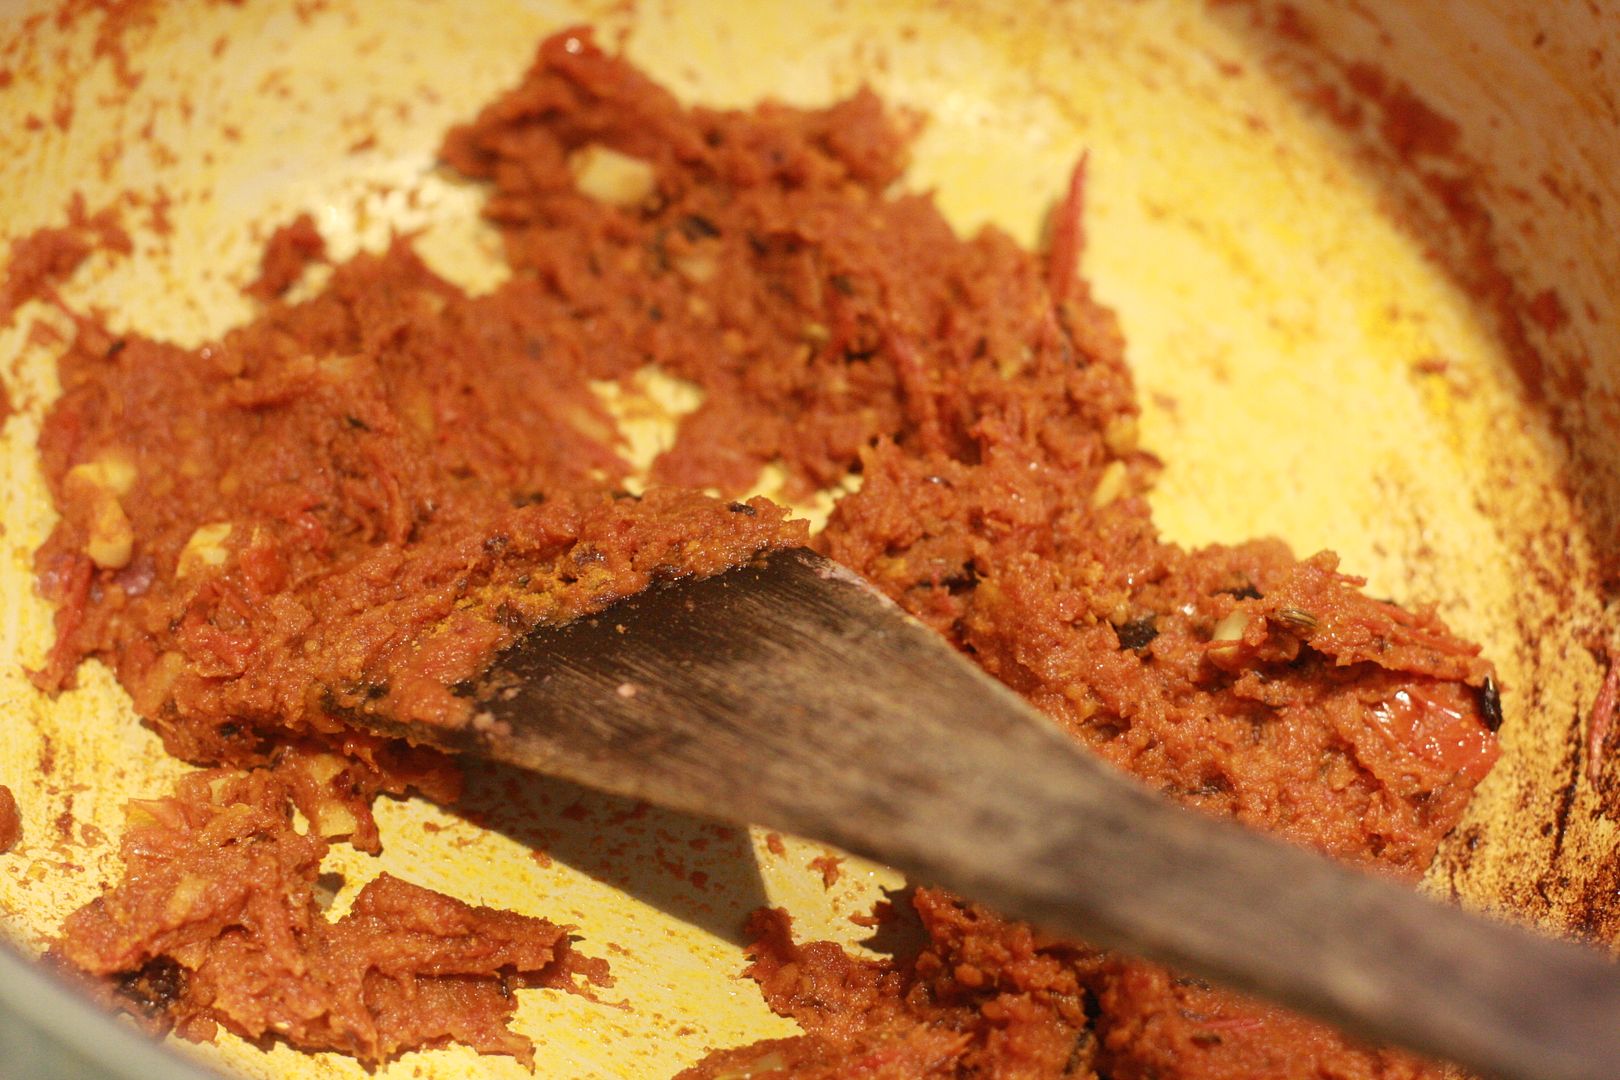
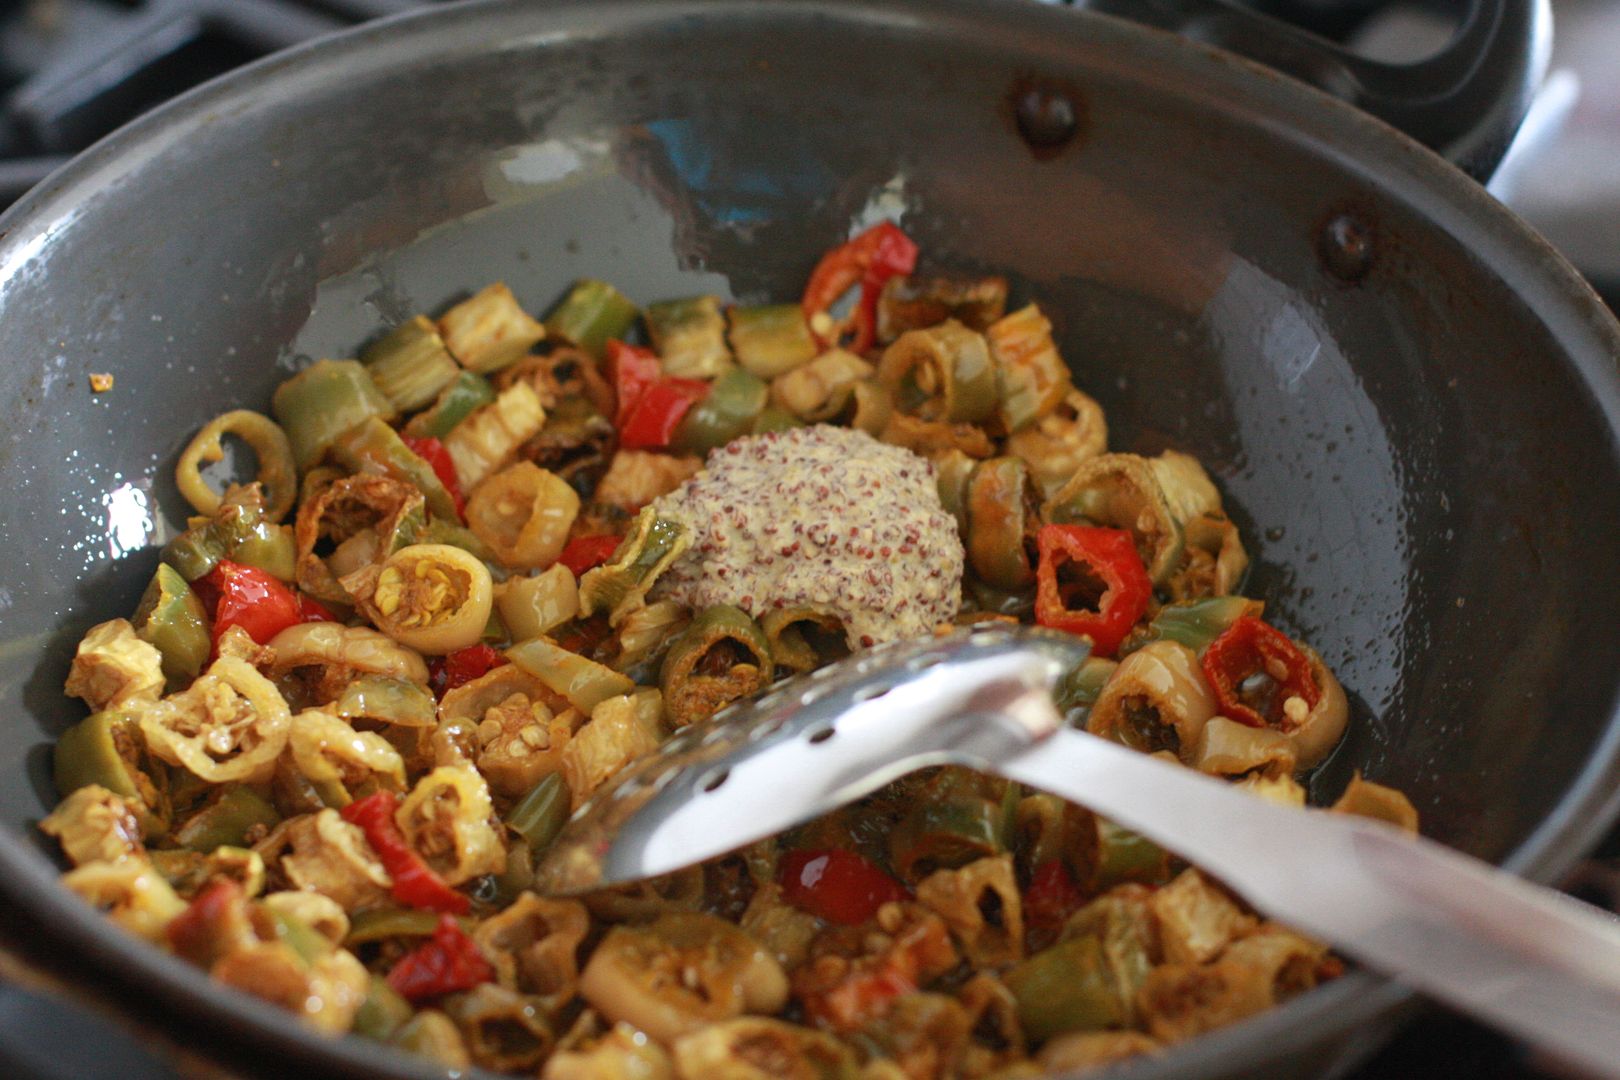
Sauté the raw onion and tomato mixture till all the moisture evaporates, now add in the blended onions and spice mixture and sauté till it bubbles and leaves the sides of the pan.
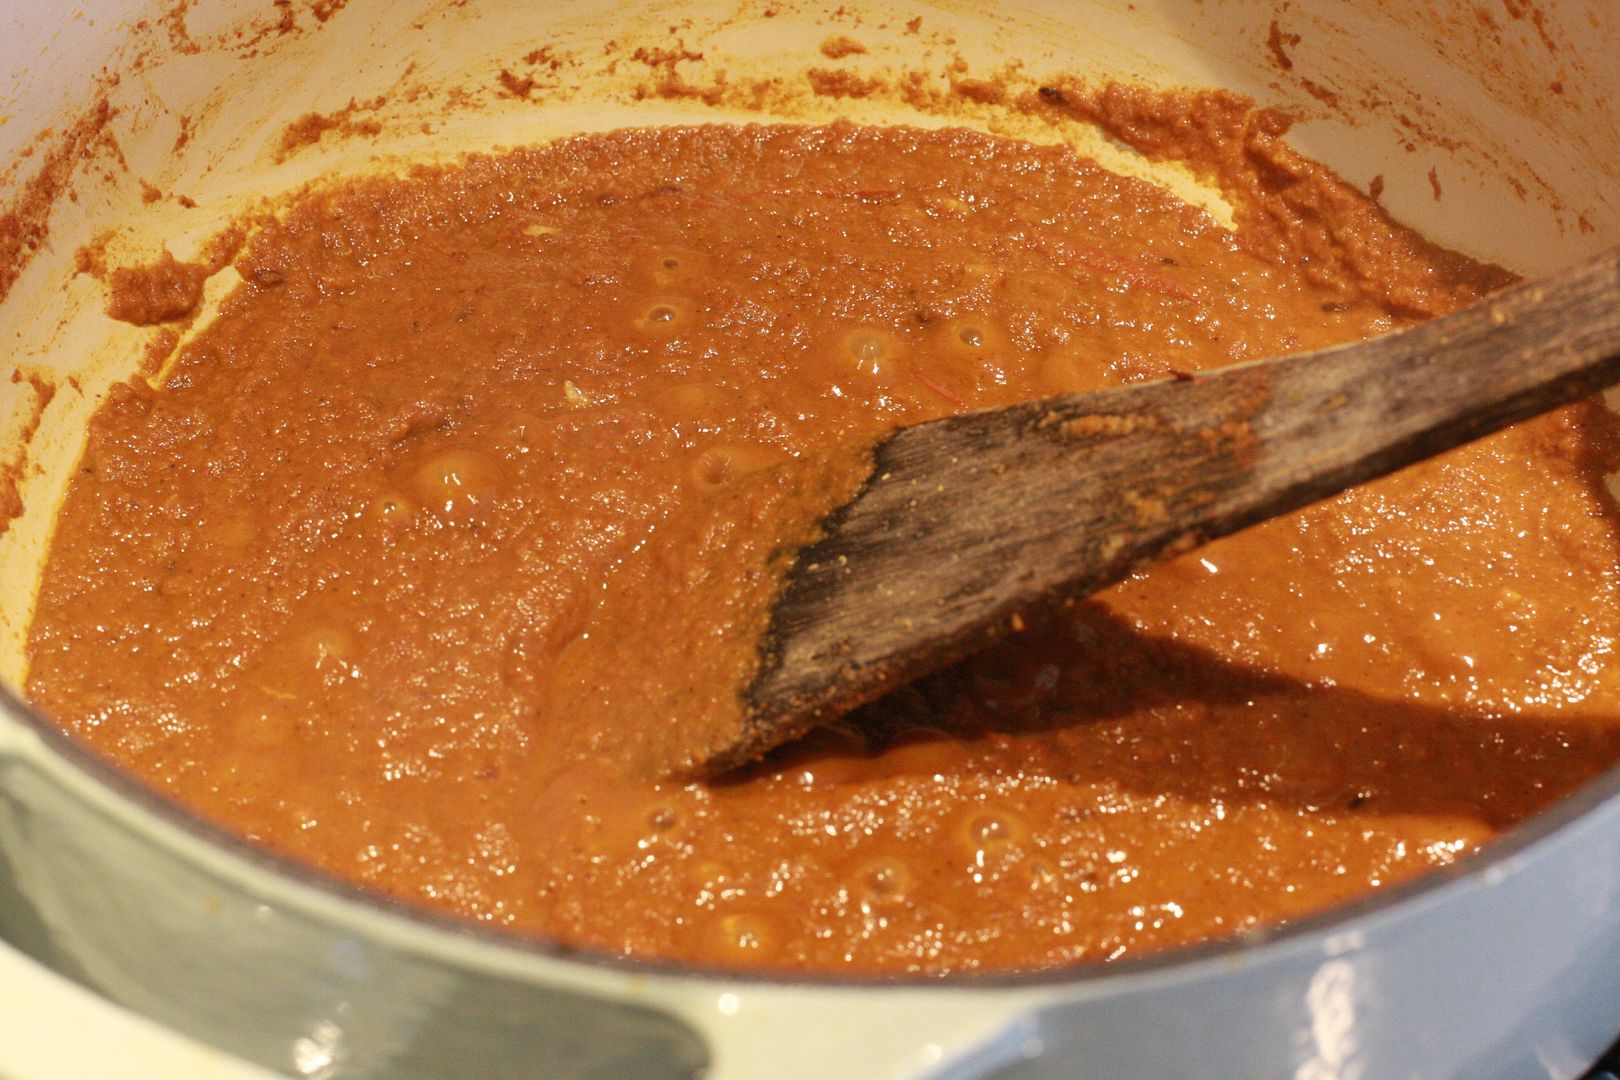
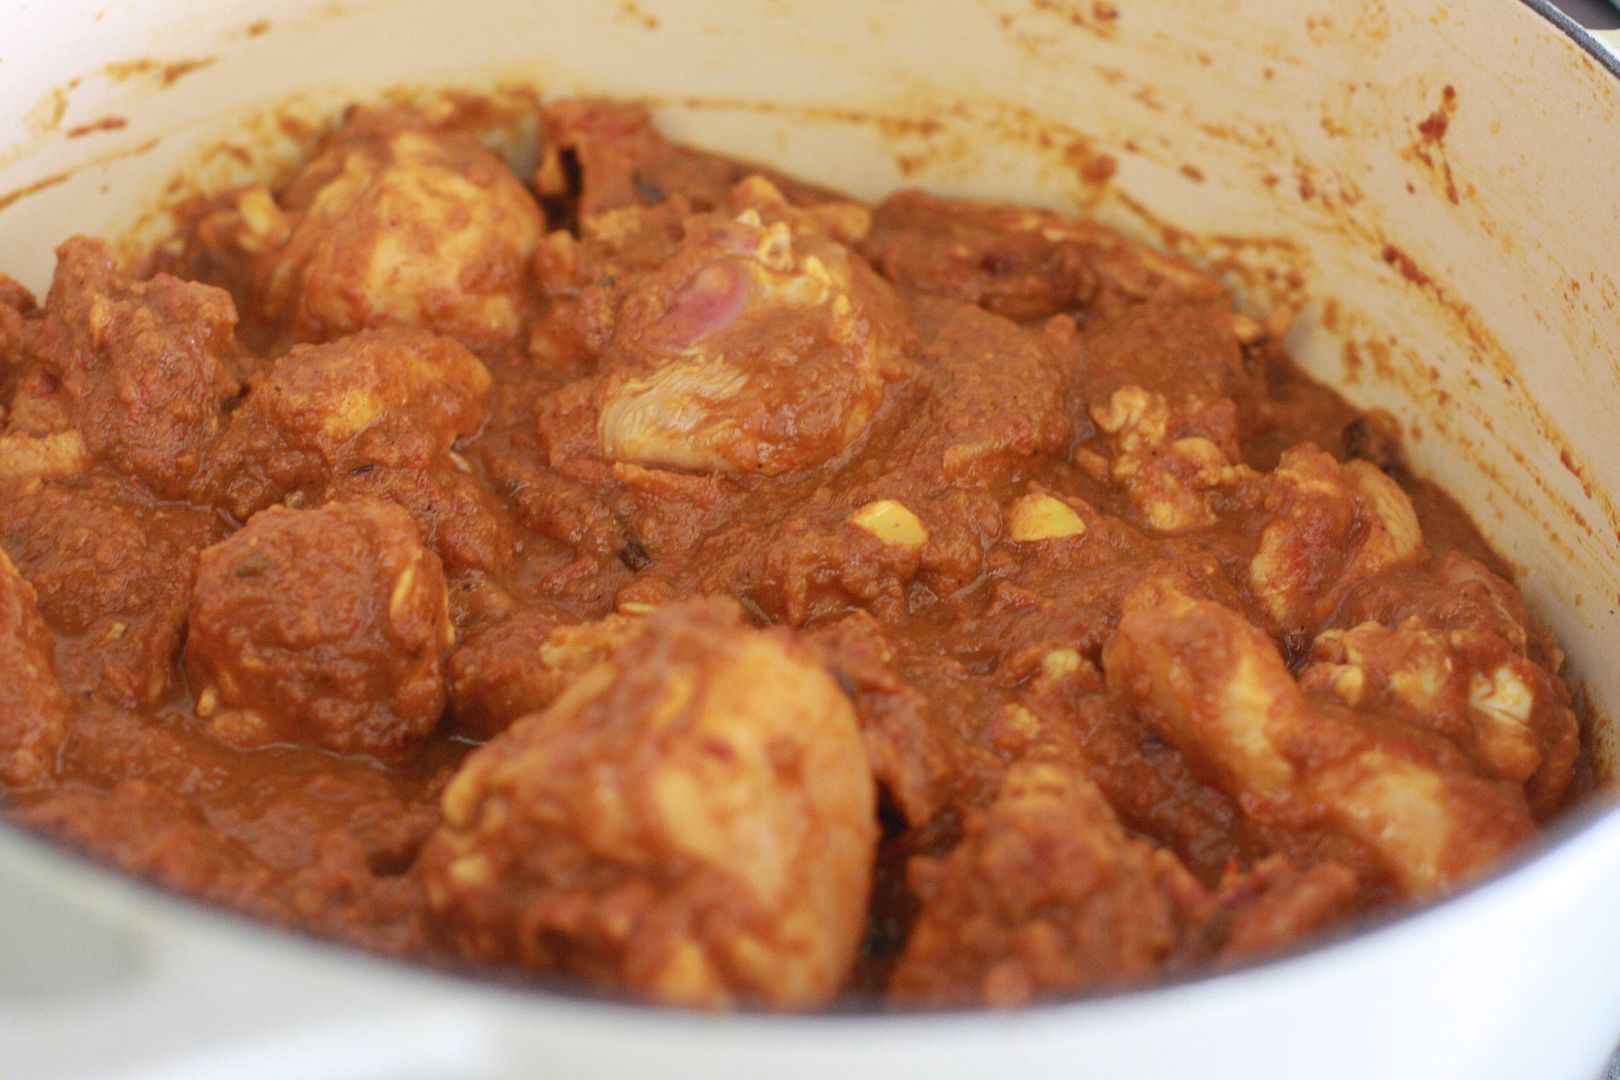
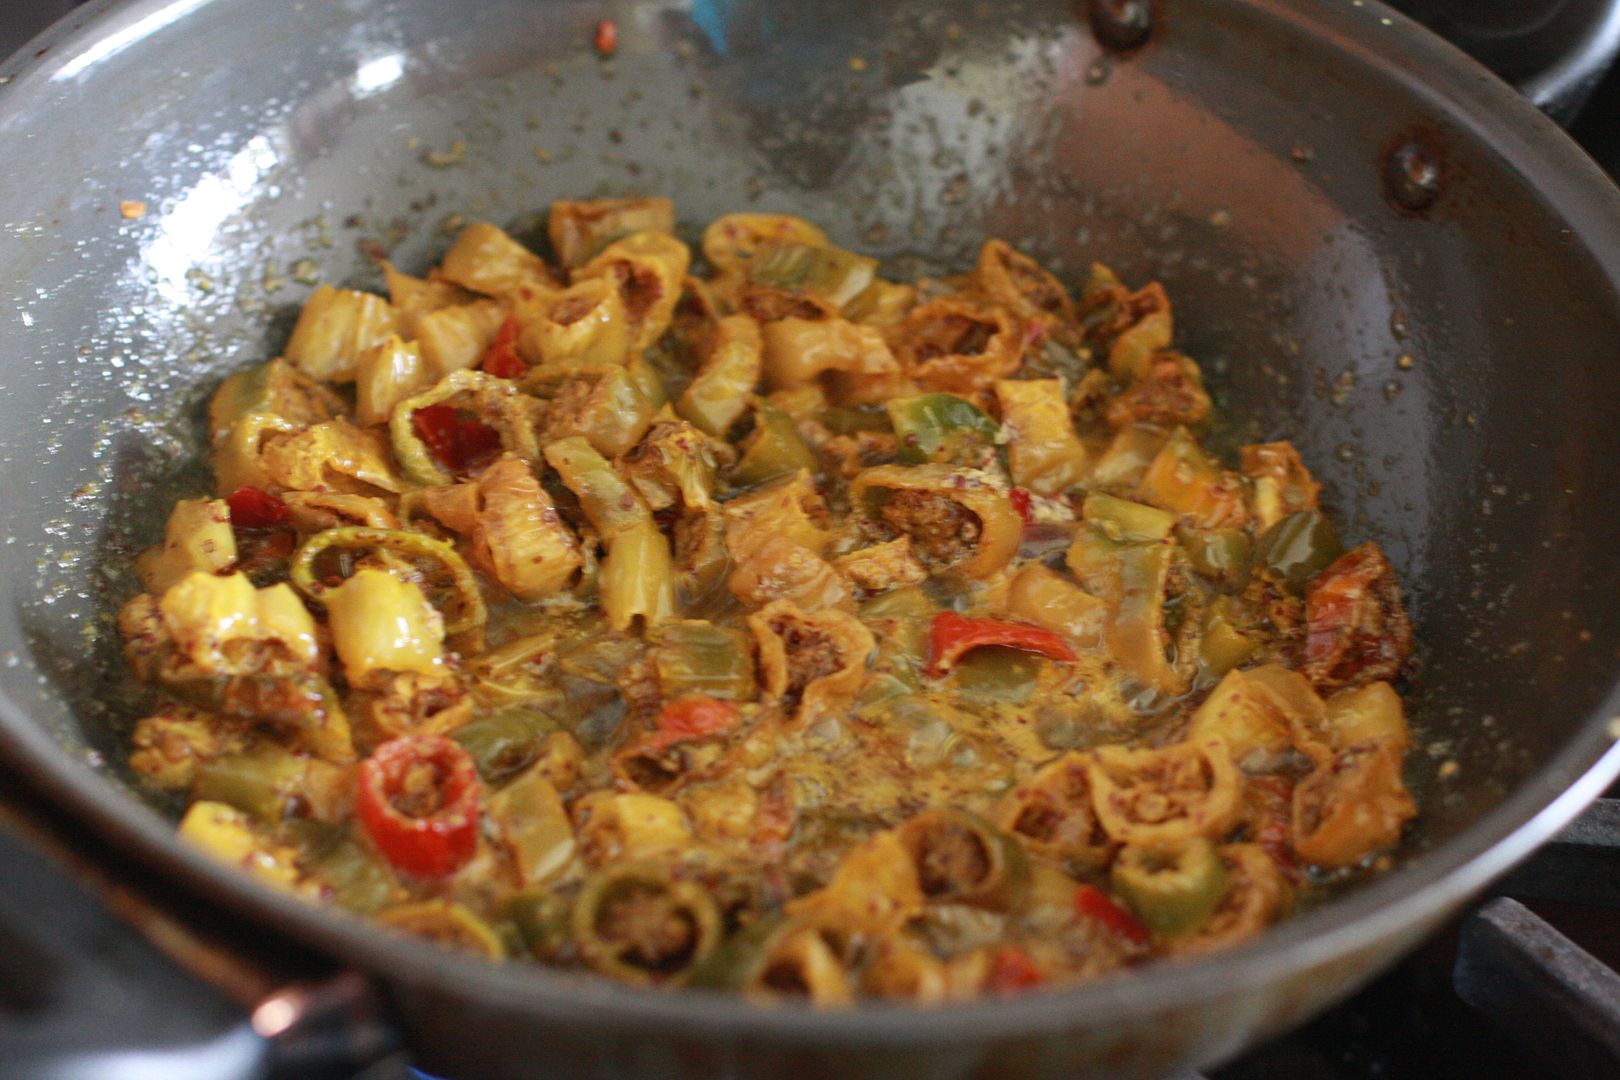
Once the gravy is nice and thick, add in the chicken and let it boil till the chicken is completely cooked.
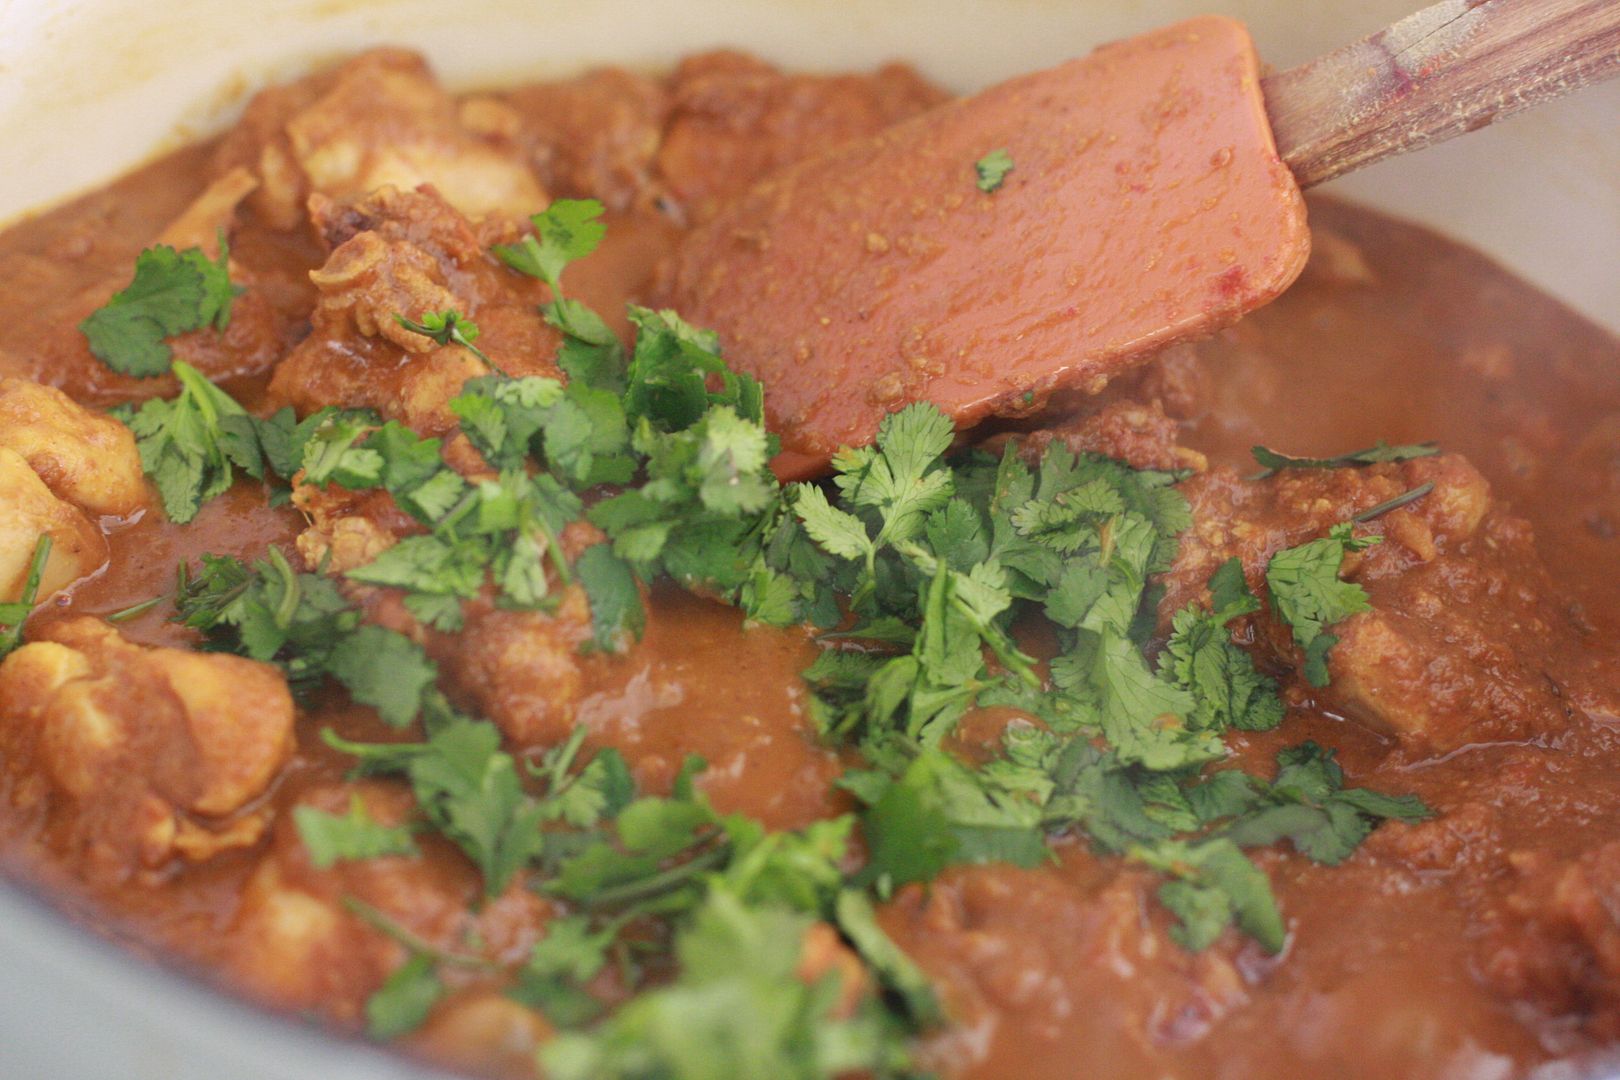
Sprinkle coriander leaves on top and turn off the heat.

Perfect with some soft chapatis, rotis or steamed rice.

 photo IMG_4085_zpsoty0iaym.jpg

Kadai Chicken - Gravy Style
Preparation Time: 20 minutes
Cooking Time: 40 minutes
Ingredients
  1. 2 lbs of *chicken thighs with bones cut into bite sized pieces
  2. 1 1/2 cups of red onion or shallots finely chopped split into 1 cup and 1/2 cup.
  3. 5 cloves of garlic + 2 inch piece of ginger
  4. 6 -8 red chilies (depending on the heat)
  5. 6-8 tomatoes chopped
  6. Whole spices - cinnamon small piece, few cloves, 2 leaves of star anise, fennel seeds
  7. To Roast - 1 tbsp. coriander seeds, 1/4 tsp cumin seeds, 1 tsp pepper corn, small cinnamon piece, few cloves
  8. a handful of coriander leaves
  9. salt to taste
  10. 2 tbsp. oil

Method
  1. In a sauté pan dry roast coriander seeds, cumin seeds, pepper corn, cinnamon and cloves. When they change color transfer to a blender. Blend to a powder.
  2. Take 1/2 cup of the raw onion and blend it to a paste. Set aside.
  3. In a sauté pan heat 1/2 tbsp. oil and sauté the onions, garlic, ginger and red chilies. Transfer to the blend with the powdered spices. Now blend them together to a fairly smooth paste.
  4. In a deep bottomed wide mouthed pan heat oil (cast iron Dutch oven), add the whole spices and let them turn color (about a minute).
  5. Add in the onion paste and sauté till the oil starts to separate, a good 8-10 minutes.
  6. Add in the tomatoes and sauté till it turns mushy and the moisture is completely removed and the mixture moves away from the sides another 8-10 minutes.
  7. Now add the blended masala paste and let it come to a boil. You will see bubbles on the surface. About 6-8 minutes
  8. Add in the chicken pieces and continue to cook till the chicken is completely cooked. About 8 minutes or so depending on the kind of chicken.
  9. Once the chicken is cooked sprinkle the coriander leaves and turn off the heat.

Like what you are reading? Subscribe!

Saturday, January 18, 2020

Pepper Beets

I love beets and so does my family. It tastes good with whatever spices it is cooked with. What more is there is to ask. It took me two seasons to learn but now I have a hang of how to grow beets. Don't have to tell you, home grown beets is absolutely no comparison to the store bought ones. They are sweet, tender and crisp. I try my best to buy only organic beets because the conventionally grown beets have a a metallic taste that all of us in the family can taste. While the organic beets are far better they are not quite not there when compared to home grown ones.

Obviously home grown ones are eaten at the peak of their deliciousness and flavor so obviously they are more tasty.


This recipe was suggested by a friend. It is quick and quite simple but very tasty. It is similar to this pepper mushroom.

 photo IMG_3416_zpss1pkoina.jpg


Pepper Beets
Preparation Time: 15 minutes
Cooking Time: 20 minutes
Ingredients
  1. 3 medium beets (about 3 cups diced)
  2. 1/2 cup of onions diced fine (optional)
  3. seasonings: mustard seeds, cumin seeds
  4. 1/2 tsp of cumin powder
  5. 1/2 tbsp of finely ground pepper powder
  6. salt to taste
  7. 2 tsp of oil

Method
  1. Wash and peel the beets and then finely dice them.
  2. In a saute pan heat oil, add the mustard seeds and cumin seeds. When the mustard seeds pop add the onions and saute till they start to get translucent. (I did not add onions).
  3. Now add the diced beets and saute them for about 10-15 minutes. The beets should be almost cooked at this point.
  4. Add in the salt and pepper powder and saute for a few minutes more and turn off the heat.


Like what you are reading? Subscribe!

Monday, January 13, 2020

Jalapeno Pickles (with mustard paste and vinegar)

I like growing jalapenos. They are easy plants to grow and make for some deliciousness. I mainly grow them for making these stuffed jalapeno peppers which are very popular around our house. We also eat a lot of jalapeno pickles, the ones in vinegar used in sandwiches. I started making these once I realized that the store ones had yellow food coloring in them.

Anyway couple of weeks in the summer I usually have an overload of jalapenos and I am ready to try any recipe that comes my way. A friend had tried this Indian Pickled Jalapeno Chili Peppers. She conceded that they were very spicy for her taste. I had bought seeds for spicy jalapenos and the jalapenos were indeed very spicy. I like my jalapenos to be on the milder side so they work well in the stuffed jalapeno recipe that I usually use my jalapenos for.

The sun was at its brightest and I wanted to try sun drying the chilies and making this recipe. They were indeed spicy but over time they mellowed and provided a good kick in the colder months for a sandwich or yogurt rice.


 photo IMG_3898_zpsjs2ahyw0.jpg

****Some precautions to take while slicing the jalapenos. In some ways these jalapeno chili enzymes are more strong than the regular green chilies. I have forgotten or been lazy to use gloves and have paid the price for it later with burning hands, face and eyes :(
Even with gloves this packs a good punch.

Slice the jalapenos, add the turmeric powder and salt.
Mix it well. Tie a cloth around the glass container.
Let it stay in the sun for 10 days. Once it has sun dried, soak the mustard seeds overnight and blend
it.
Heat oil add mustard seeds, add the sun dried jalapenos and the mustard paste.
Mix it well and let it come to a boil and then add the roasted fenugreek-asafetida powder.
Mix the roasted powder and turn off the heat and let it cool.

The heat from the jalapenos and believe it or not, the mustard paste ended up giving it some more pungency. So we were all afraid to touch it for a while but after another 15 days it mellowed down enough and then we couldn't get enough of it and it was over in a flash :)

 photo IMG_3934_zpsfihubvhv.jpg

Jalapeno Pickles with mustard and vinegar
Preparation Time: 20 minutes
Sun Drying Time: 5-10 days
Cooking Time: 30 minutes
Ingredients
  1. 2 lbs of Jalapenos
  2. 1/2 cup of salt
  3. 1 tbsp. of black mustard seeds
  4. 1 cup of distilled white vinegar
  5. 1/2 cup of oil (I used sesame oil
  6. 1/2 tbsp. of turmeric powder
  7. 1 tsp fenugreek seeds
  8. 1/2 tsp asafetida

  1. Wash and completely dry the jalapenos. Spread them on a kitchen towel overnight.
  2. Cut the tips of the jalapenos. Slice the jalapenos, remove as much of the seeds as possible but covering the lids and giving it a few vigorous shakes. The seeds will fall out. Remove the jalapeno slices to a glass or ceramic container.
  3. Add salt and turmeric powder, tie a muslin or cheese cloth over the ceramic or glass bowl and let it sit in the sun for as many days as you want. (I got busy with summer madness and left the chilies out for more than 10 days. No harm done.
  4. Soak the mustard seeds in vinegar overnight and blend to a paste.
  5. Dry roast the fenugreek powder and blend it to a powder along with the asafetida.
  6. In a wide mouthed pan heat oil, add the sun dried vinegar pieces along with the mustard paste. Let it come to a boil.
  7. Add the powdered fenugreek-asafetida powder, give a good mix and turn off the heat.
  8. Let cook and store in sterilized glass bottles.
  9. No need to refrigerate these pickles, they stay fine with all the salt and the vinegar.
Like what you are reading? Subscribe!

Wednesday, January 8, 2020

Whole Roasted Fish - In the Oven

This is one of those quick recipes with maximum taste and deliciousness and even better it is easy to make. While in the summer time this might be a good one to put on the grill, the winter months this is a great to be done in the oven.

I found whole cleaned sea bass in Costco. The thing about sea bass is it has a mild flavor but it is a fairly firm textured fish. With baking or roasting fish in the oven I expect the kitchen to smelly fishy for a little bit. But with sea bass that was not a problem. So there is no excuse now :)


The marinade is very simple but I prefer to apply the marinade on the fish and let it sit for at least 4 hours before it goes in the oven. If you are in a rush you could bake it right after you apply the marinade but the test and texture of the fish might not be the same. The great thing is the fish came scaled and cleaned so there was no time spent on that.

Apply the marinade and wrap the fish in plastic sheet.
Roast in a 450F preheated oven for 15 -18 minutes till done.

Very simple process.

IMG-4057


Whole Fish Roasted - In the Oven
Preparation Time: 15 minutes
Marinating Time: 4-6 hours
Baking Time: 18-20 minutes
Ingredients
  1. 3 whole sea bass (scaled and gutted)
  2. 3 lemons
  3. For the Marinade
  4. 1/2 tbsp of ginger powder
  5. 1 tbsp of garlic powder
  6. 2 tsp of turmeric powder
  7. 2 tsp of mustard powder
  8. 1 tbsp of red chili powder
  9. 2 tbsp or more of vegetable oil
  10. salt to taste

Method
  1. Mix the ingredients for the marinade in the olive oil and set aside.
  2. Clean and pat dry the fish to remove any excess moisture.
  3. Make gentle cuts on both sides of the fish. Now liberally apply the marinade on both side and in the gills.
  4. Slice the lemon thin and stick half a slice of lemon in each of the cuts.
  5. Wrap the fish in plastic sheet on a baking tray and put in the fridge till ready to bake/roast.
  6. Preheat the oven to 450F. Remove the plastic sheet and put the baking tray in the oven and roast for 15 minutes. Check to see if cooked and dry on the outside.
  7. Put an another 2-3 minutes only if the fish is not cooked. Overcooking will dry out the fish.

Serve over a bed of rice or any desired accompaniments.

Like what you are reading? Subscribe!